
AppSheet Tutorial for Beginners: How to Create Custom Mobile and Web Applications Without Code
Learn to Connect Data Sources, Configure Views, and Test Your App in the AppSheet Emulator. Deploy Your App and Manage It with Usage Analytics and Version Control.

AppSheet is a no-code platform that allows anyone to create custom mobile and web applications without writing any code. This means that even if you have no programming experience, you can still create fully functional apps that can be used by yourself or shared with others. In this article, we'll walk you through the process of creating an app using AppSheet.
Step 1: Sign up for AppSheet
The first step to using AppSheet is to sign up for a free account on the AppSheet website using your Google or Microsoft credentials. Once you're logged in, you can create a new app by clicking on the "New App" button.
Step 2: Choose a data source
After you've created a new app, you'll be prompted to choose a data source for your app. AppSheet supports a wide variety of data sources, including Google Sheets, Microsoft Excel, Salesforce, and more. Choose the data source that you want to use for your app.
Step 3: Connect your data source
Once you've chosen your data source, you'll need to connect it to AppSheet. This involves granting AppSheet permission to access your data. Depending on the data source you've chosen, you may need to enter your login credentials or authenticate your account in order to grant AppSheet access.
Step 4: Configure your app
Once your data source is connected, you can begin configuring your app. This involves setting up the various views and actions that your app will use. For example, if you're creating an app to manage inventory, you might set up a view that shows all of the items in your inventory, and an action that allows you to add new items.
AppSheet provides a drag-and-drop interface that makes it easy to configure your app. You can add and arrange elements like buttons, forms, images, and more. You can also customize the look and feel of your app to match your branding or personal style.
Step 5: Test your app
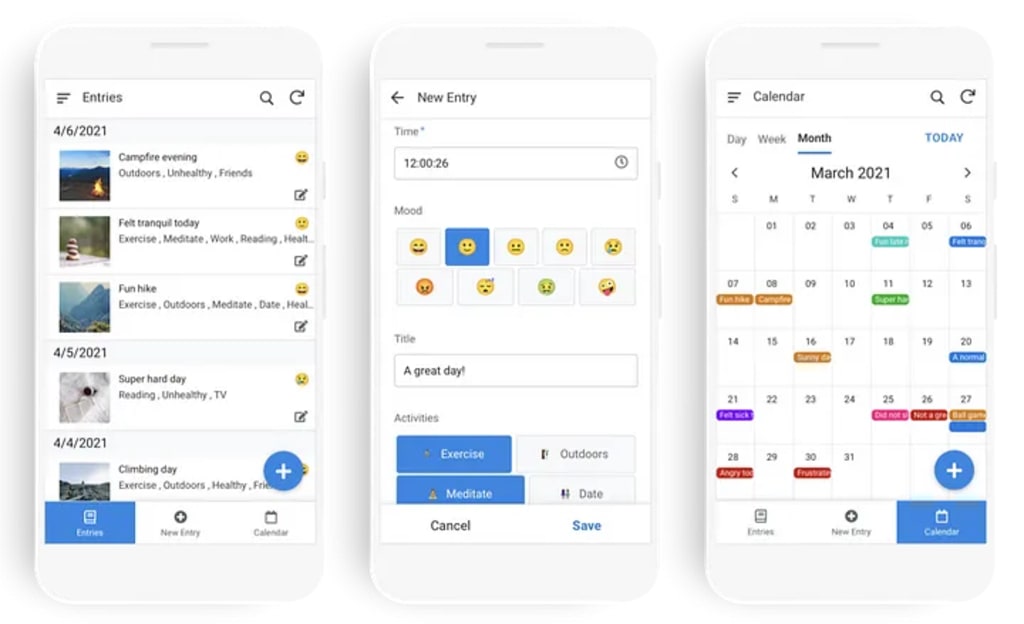
Once you've configured your app, you'll need to test it to make sure everything is working correctly. AppSheet provides an emulator that allows you to test your app without needing to install it on your device. You can test your app on both iOS and Android platforms to ensure that it works as expected.
The emulator also provides a preview of how your app will look on different devices. This is important because different devices have different screen sizes and resolutions, and your app should be optimized for all of them.
Step 6: Deploy your app
When you're ready to deploy your app, you can do so with just a few clicks. AppSheet provides a range of deployment options, including sharing your app via a URL, publishing your app to the App Store or Google Play, or embedding your app on a website.
Step 7: Manage your app
Once your app has been deployed, AppSheet provides a range of tools to help you manage it. For example, you can use the usage analytics to see how many people are using your app and which features are the most popular. You can also use the version control to keep track of changes to your app over time and roll back to a previous version if needed.
AppSheet also has a community forum where you can connect with other AppSheet users and share your own apps. You can find templates and sample apps to help you get started, and you can also ask for help if you need it.
In conclusion, AppSheet is a powerful tool for creating custom mobile and web applications without writing any code. With AppSheet, anyone can create a fully functional app in a matter of minutes, making it a great choice for individuals and small businesses who want to streamline their processes and improve their workflows. By following the steps outlined in this article, you can create your own app using AppSheet
About the Creator
saravanamoorthi Rangasamy
So called Human
Keep reading
More stories from writers in Education and other communities.
Why the Eyewear Market Is Transforming Vision Care and Personal Style?
Beyond vision correction and eye protection, eyewear has been widely adopted as a generic fashion accessory. Today, the eyewear market straddles health care, technology and the fashion industries in terms of both function and appearance.
By Akshay Kumarabout an hour ago in Education


Comments (2)
it was ver good.
Its very usefull..Nice