
7 Easy Steps On How To Install And Replace Bathroom Exhaust Fan: Improve The Ventilation!
Install and replace
Installing an exhaust fan in your rest room is the answer that you want for these areas that by no means appear to get dry. And if you can take away loo moisture and odors, then it would assist to make a some distance extra fantastic toilet ride for everyone.
What You Will Need To Install And Replace Bathroom Exhaust Fan
When you are working on any form of domestic wiring or electrical configuration, the most necessary step is to first disconnect the energy at the breaker box. You ought to additionally put on gloves, goggles, and respirators whilst working in dusty conditions.
Before you begin to set up or change your lavatory exhaust fan, you have to get your equipment and substances together. Here is the listing of equipment and substances required:
- Goggles
- Screwdriver
- Oscillating saw
- Hand gloves
- A utility knife
- Flexible caulk
- Circuit tester
- Putty knife
- Wire connectors
How To Install And Replace Bathroom Exhaust Fan: Follow These 7 Steps
The installation process of different types of exhaust fans follows almost the same basic steps. Here, our guide will show you how to install and replace bathroom exhaust fan in 7 easy and simple steps.
1. Determine Which Type Of Exhaust Fan To Purchase
Before you take away your historical lavatory exhaust fan, you must word any markings and additionally measure its exterior profile. Because these matters may be beneficial to decide which kind of exhaust fan you want to buy as a replacement.
And followers are normally accessible in the market in distinctive sizes and capacities based totally on the rectangular pictures of the room they service.
However, if you want to change an present exhaust fan, the best alternative is to substitute the older fan with one of equal size.
When you desire to deploy new exhaust followers in rooms with a trendy 9-foot ceiling height, first you want to calculate the rectangular pictures of your loo to decide which kind of exhaust fan you will need.
Generally, small followers are nice for smaller lavatories with up to 70 rectangular toes of space. Medium followers can accommodate between 70 and one hundred rectangular ft of area and giant followers are best for these purposes the place extra than a hundred rectangular toes of house want ventilation.
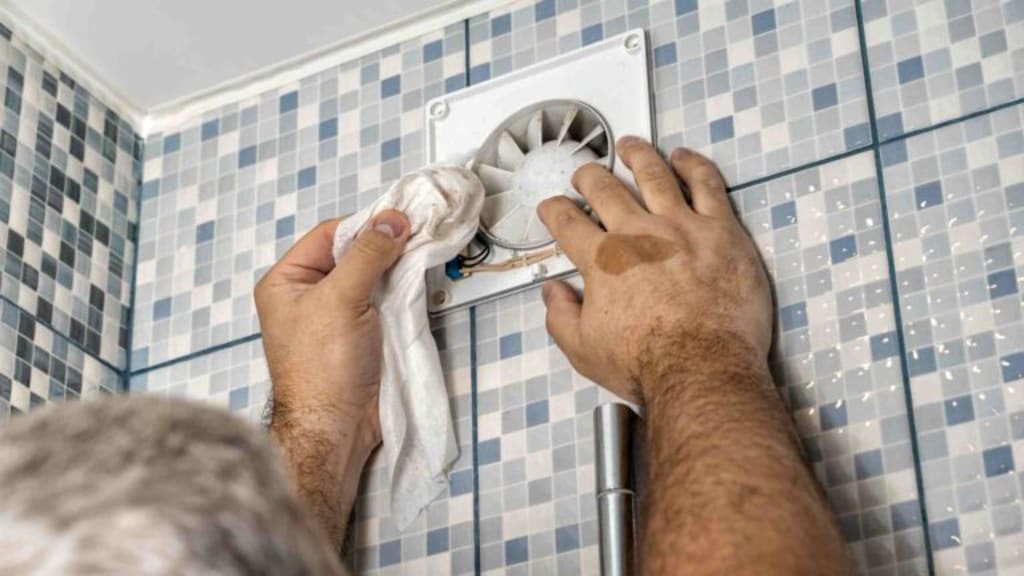
2. Removing The Old Exhaust Fan
First, you want to flip off the electrical energy to the residence at the breaker box. Now, as the fan is nonetheless running, you must flip the breaker switches till the fan absolutely stops.
Also, we would strongly advise you to depart a word on the electrical panel so that no one else turns the electricity on whilst you are doing the substitute work.
And you need to put on goggles to keep away from particles in the eyes. Then simply use a screwdriver to put off the grill from the ancient exhaust fan motor.
After that, the usage of a circuit tester you need to affirm that there is no electrical energy presently flowing to the exhaust fan. Now, if you can discover a plastic electrical connector or plug, honestly disconnect the fan’s wires.
Then, you have to use a screwdriver to eliminate the screws that are preserving the ancient exhaust fan in place. In this step, you can additionally take some exclusive care to guide the fan to make positive that it doesn’t fall or wreck free from the last screws.
When you are in a position to decrease the exhaust fan assembly, then you have to have get admission to to any ducting attachments that may be maintaining it in place. Finally, you can set the historical exhaust fan meeting aside.
3. Create An Opening Of Appropriate Size For Your New Exhaust Fan
If you are now not changing your ancient exhaust fan with the equal model or an upgraded mannequin that makes use of the identical housing and bracketry, then you would want to put off the ancient exhaust fan housing the usage of a screwdriver.
You need to take away any hardware that is protecting the historic housing in area and additionally the housing itself. Now, you can keep your new exhaust fan meeting over the gap left via the ancient fan.
Then, you want to mark round its perimeter to set up the measurement and form of the gap that you would want to reduce in the ceiling drywall for your new fan.
After that, use an oscillating saw and suitable defensive tools for your eyes and fingers to reduce alongside the traced line to create an opening of excellent measurement for your new fan.
Also, it is truly necessary to make certain that you would no longer hit plumbing or electrical strains on the different aspect of the drywall.
However, if you are putting in the exhaust fan machine for the first time in your bathroom, then you would possibly additionally want to reduce away fabric thru the attic or crawl house above the toilet in which you are working.
Because you want to accommodate the fan motor meeting and ducting without delay above the ceiling gap in your bathroom.
4. Install Your New Exhaust Fan Housing
Now, you can region your new exhaust fan housing over and inner the newly reduce hole. Then, affirm that all lengths and angles of the gap are fantastic or not.
If these are correct, then you need to proceed with the set up technique of the housing by means of following the manufacturer’s set up instructions.
Any screws that would be used to impenetrable the housing will want their holes pre-drilled and you ought to use the housing brackets as a template for the holes.
After finishing the pre-drilling and putting in the new fan housing properly, you want to take a look at to make positive that all housing portions are impervious and succesful of bearing the weight of the fan.
And if you are putting in the exhaust fan device for the first time, then mounting to a joist and additionally doubtlessly some blocking off between joists will surely be wanted to aid the weight of the exhaust fan and ducting.
Because you must now not rely on sheetrock by myself to assist the weight of any object that is now not designed for such a configuration.
Finally, you want to elevate the fan motor meeting into vicinity and then invulnerable it to the housing brackets by using the use of the manufacturer-supplied hardware.
Next imp Full information read more....
About the Creator
Nilesh Sharma
Hi! I’m a passionate creator sharing free stock photos, royalty-free images, and quality PNGs.
Explore my curated collections and download high-quality images with no watermark at https://freestockphotoshub.blogspot.com/
Keep reading
More stories from Nilesh Sharma and writers in Education and other communities.
Generosity Without Boundaries: Advancing Equity Through Philanthropy
Philanthropy has always played a meaningful role in shaping societies and improving the lives of individuals in need. From supporting educational programs to funding healthcare initiatives, acts of giving have helped communities overcome many challenges. In today’s diverse world, however, philanthropy is taking on a deeper purpose. It is increasingly focused on equity—ensuring that resources and opportunities are distributed fairly among people from different backgrounds and circumstances.
By John Olin Killgorea day ago in Education


Comments
There are no comments for this story
Be the first to respond and start the conversation.