
10 Tips To Improve Your Blood Draw Techniques.
Enhance your venepuncture skills with our 10 expert tips. Learn how to refine your blood draw technique for enhanced patient outcomes and sample accuracy.
Mastering the art of venepuncture is a vital skill for many healthcare professionals, including nurses, doctors, and dedicated phlebotomists. A successful blood draw is more than just a technical procedure; it is an experience that directly impacts patient comfort, safety, and the accuracy of diagnostic results. Whether you are newly qualified or have years of experience, there is always room for refinement.
Improving your technique reduces patient anxiety, minimises the risk of complications like haematomas, and ensures you obtain a viable sample on the first attempt. This guide provides ten practical tips to help you enhance your blood draw skills, leading to increased confidence and improved patient outcomes.
1. Prepare Your Patient and Your Workspace
A smooth blood draw begins long before the needle is uncapped. Start by creating a calm and professional environment. Greet your patient warmly, confirm their identity, and clearly explain the procedure to them in a way that is easy to understand. This helps to alleviate anxiety and build trust.
Ensure your workspace is clean, organised, and well-lit. Lay out all your equipment in the order you will use it: tourniquet, alcohol swabs, needles, collection tubes, gauze, and tape. Having everything within easy reach prevents fumbling and allows you to focus entirely on the patient.
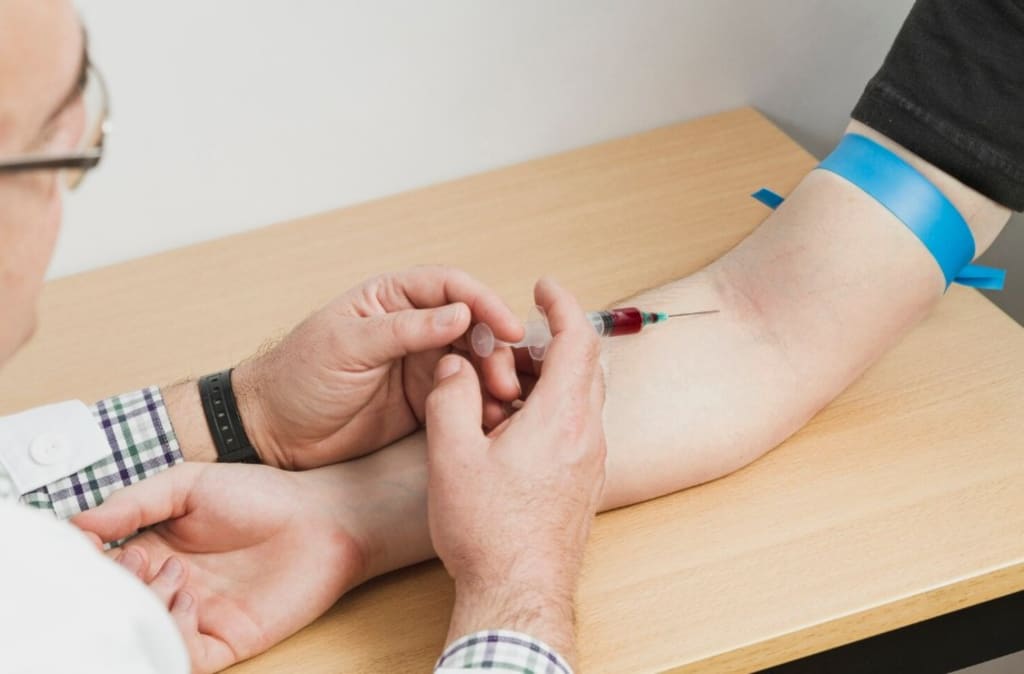
2. Master the Tourniquet
The tourniquet is essential for making veins more prominent, but incorrect use can cause problems. Apply it 3-4 inches above the intended puncture site, tight enough to engorge the veins but not so tight that it cuts off arterial flow. Never leave a tourniquet on for more than one minute, as prolonged application can lead to haemoconcentration and affect test results. If you are struggling to find a vein, release the tourniquet, allow blood flow to normalise for a couple of minutes, and then reapply.

3. Choose the Right Vein
The median cubital vein, located in the antecubital fossa (the crook of the elbow), is the gold standard for venepuncture. It is typically large, stable, and close to the surface. If it is not accessible, the cephalic and basilic veins are good alternatives; however, the basilic vein is closer to an artery and nerve, requiring more caution. Encourage the patient to make a fist (but not pump it) to help veins stand out. Use your index finger to palpate, or feel, for a vein that is bouncy and full.
4. Anchor the Vein Firmly
A rolling vein is a common cause of missed blood draws. To prevent this, you must anchor the vein securely before inserting the needle. Use the thumb of your non-dominant hand to pull the skin taut about 1-2 inches below the puncture site. This simple action stabilises the vein, stops it from moving, and makes needle insertion smoother and less painful for the patient.
5. Perfect Your Angle of Insertion
The angle at which you insert the needle is critical for success. For most antecubital draws, a 15 to 30-degree angle is ideal. A shallower angle is required for more superficial veins, such as those on the back of the hand. Entering at too steep an angle risks puncturing through the vein entirely, while too shallow an angle can cause the needle to skim along the top. This skill is a cornerstone of training, and any good 'how to become a phlebotomist' guide will emphasise practising it until it becomes second nature.
6. Use the Right Equipment
Selecting the appropriate needle and collection system for the patient's vein size and the required blood volume is crucial. A standard straight needle (21 or 22 gauge) is suitable for most adults. For patients with small, fragile, or difficult veins, such as the elderly or paediatric patients, a butterfly needle (23 gauge) offers greater precision and control.

7. Bevel Up, Smooth Entry
Always ensure the bevel (the slanted opening at the needle's tip) is facing upwards upon insertion. This allows the sharpest point of the needle to pierce the skin first, creating a cleaner entry and minimising discomfort. Insert the needle in a single, smooth, and deliberate motion. Hesitation can increase pain and cause you to miss the vein.
8. Know Your Tube Order of Draw
Filling blood collection tubes in the correct sequence is vital to prevent cross-contamination of additives between tubes, which can compromise test results. The standard order of draw is based on the additives in each tube. Following this protocol is a non-negotiable part of the job that protects the integrity of the sample.
9. Handle Complications with Confidence
Even with perfect technique, complications can arise. If a haematoma (bruise) starts to form, release the tourniquet immediately, withdraw the needle, and apply firm pressure to the site. If the patient feels faint, stop the procedure and help them lie down. Knowing how to respond calmly and correctly to adverse events is a key competency. A comprehensive guide on how to become a phlebotomist will always include in-depth training on identifying and managing these situations effectively.
10. Prioritise Post-Draw Care
Your responsibility does not end once the blood is collected. After withdrawing the needle, immediately engage the safety device. Apply firm pressure to the puncture site with clean gauze for several minutes. Ask the patient to keep their arm straight, as bending the elbow can increase the risk of bruising. Once bleeding has stopped, secure the gauze with medical tape and provide the patient with any necessary post-procedure instructions.
Conclusion
Improving your blood draw technique is an ongoing process that blends technical proficiency with excellent patient care. By focusing on meticulous preparation, mastering the fundamentals of vein selection and needle insertion, and handling the entire process with confidence, you can significantly enhance your skills. Consistently applying these ten tips will not only make the procedure smoother and safer but also enhance the experience for every patient you see, distinguishing you as a truly skilled and compassionate practitioner.
About the Creator
Graduated… But Still Broke. Why
Graduation day feels like victory. The hall is full. Names are called one by one. Parents sit proudly in the audience, holding their phones high to record the moment. Friends clap loudly. Teachers smile with approval. For years, this was the goal. Study hard. Get good grades. Earn the degree. And when that certificate finally rests in your hands, it feels like a passport to success. But sometimes, the applause is louder than the opportunity that follows.
By Shahid Zaman2 days ago in Education
The Dark Side of AI: What Could Artificial Intelligence Become in 100 Years?
But while AI promises innovation and efficiency, an important question remains: What could AI become 100 years from now?Looking ahead to the next century, the darker possibilities of artificial intelligence deserve serious attention.
By Spondan Chowdhury3 days ago in Education


Comments
There are no comments for this story
Be the first to respond and start the conversation.