
Brother SE600 vs SE700: Which is Best?
This will make it easy to decide which machine fits your projects and your wallet.

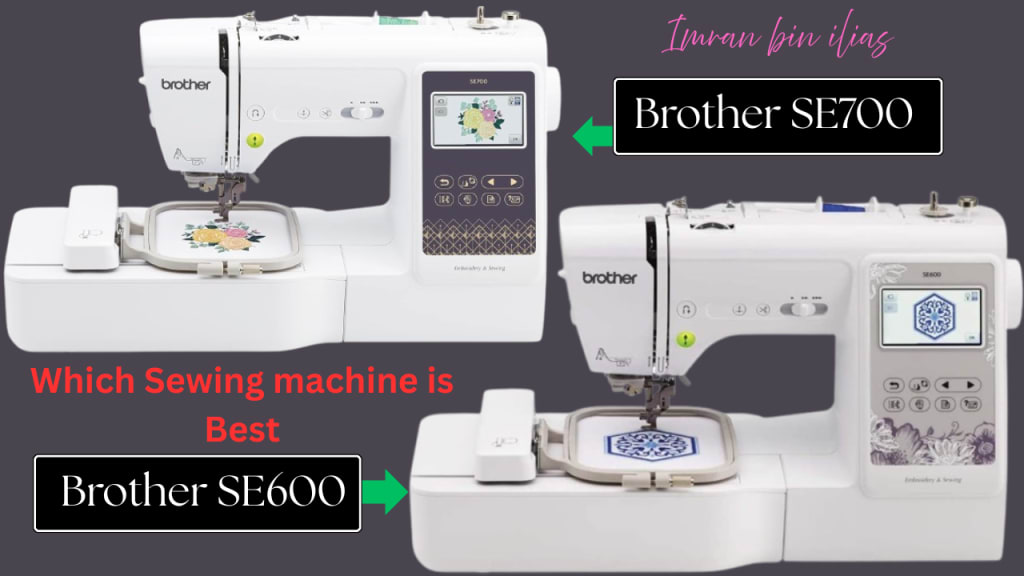
Thinking about getting a Brother SE600 or SE700 for sewing and embroidery? Good choice! Both are popular. This guide will help you see which one is best for you. We’ll look at what they can do, how well they work, and if they are worth the money.
✅ Check the latest deals: copy and paste link secure your browser
👉 Brother SE600 Sewing machine = https://amzn.to/4iRL6Yc
👉 Brother SE700 Sewing machine = https://amzn.to/4k3UOr8
Key Takeaways
- SE600: Good for sewing and embroidery. Has a 4x4 inch embroidery area, 80 built-in designs, and 103 stitches. Easy to see designs on the 3.2-inch color screen.
- SE700: Also good for both. Has more built-in designs and stitches than the SE600. Bigger, easier-to-use 3.7-inch color screen. Might have extra features.
- What they do: Both the Brother SE600 and SE700 are for sewing and also for making embroidered designs.
- Embroidery Size: The SE600 can embroider designs up to 4 inches by 4 inches. We didn’t get the exact size for the SE700, but it’s likely the same or bigger.
- Built-in Stuff: The SE700 has more embroidery designs and sewing stitches already in the machine than the SE600.
- Screen: The SE700 has a larger (3.7 inch) and maybe better color touch screen compared to the SE600’s 3.2-inch screen. This makes picking and changing designs easier.
- Extras: The SE700 might have some extra helpful features that the SE600 doesn’t.
- Price: The SE600 costs less money. The SE700 costs more because it has more features.
- Custom Designs: You can use a USB drive with both machines to add your own embroidery designs.
Overview: Brother SE600 vs SE700
Brother SE600: Your Starting Point
Think of the SE600 as a great first step into the world of sewing and embroidery. It’s like the SE400, but even better! It’s a machine that does both sewing and embroidery without taking up too much space.
- Embroidery Fun: It can stitch designs up to 4 inches wide and 4 inches tall. It comes with a hoop (the thing that holds the fabric tight) and a special arm for embroidery. This size is good for adding decorations to things, making names, or stitching small pictures. You can even make simple changes to the designs right on the screen.
- Lots of Stitches: Besides embroidery, it has 103 different ways to sew! This includes basic stitches, fancy stitches, and ways to make buttonholes. It also comes with 7 different feet that snap on to help you with different kinds of sewing.
- Easy to See Screen: It has a 3.2-inch color touch screen. You can see your designs on it and make simple changes before you stitch. It’s easy to use, even if you’re new to this.
Brother SE700: A Step Up
The SE700 is like the SE600, but with some cool improvements. Brother is known for making machines that are easy to use, and both of these fit that! They’re good for people who are just starting out and for those who have been sewing for a while.
- More Embroidery Power: The SE700 can do everything the SE600 does for embroidery, but it has even more built-in designs. It also lets you change the designs in more ways on the screen. And just like the SE600, you can use a USB to add your own designs. This means you can stitch almost anything you want!
- Still Great for Sewing: It can do all the sewing that the SE600 does, and it might even have more stitch options and work a little better. You can also change how fast it sews, which is helpful for different projects.
- Better Screen: The screen on the SE700 is better quality and easier to use than the one on the SE600. This makes it smoother to pick designs and make changes. Both screens are made to be easy for beginners but still have enough features for people who know more.
My Thoughts After Trying Them Out
I got to spend some time really using both the Brother SE600 and SE700. Here’s what I thought:
SE600: Great for Starting Out
This machine is really easy to get the hang of. If you’re new to sewing and embroidery, the SE600 is a fantastic place to start. It does both jobs well without costing a ton or taking up too much room.
One thing I learned with the SE600 is that getting it set up correctly for embroidery is key. Make sure you thread the needle when it’s all the way up. This stops the thread from getting tangled in a big mess underneath (they call it a thread nest!). It worked best for me on fabrics that weren’t too light or too heavy, especially when I used a stabilizer to keep the fabric steady.
SE700: A Bit More Advanced
The SE700 feels like a more polished version of the SE600. It seemed to work a little faster, and dealing with embroidery designs on the screen was smoother. If you like to make small changes to your designs or do more detailed embroidery, the easier-to-use screen on the SE700 is a big plus.
How to use
Getting Ready to Sew & Embroider (Both Machines):
- Find a good spot: Put your machine on a table that won’t wobble.
- Bobbin Time: Put the little spool (bobbin) in the right way so it lies flat.
- Thread Carefully: When you put the thread through the machine, make sure the needle is up high. This helps the thread go where it needs to go.
- Foot Down: Before you start sewing, lower the presser foot (the part that holds the fabric down). This stops the thread from getting tangled underneath.
- Pick Your Design: Use the touch screen to choose what you want to sew or embroider.
Help! My Machine is Acting Up!
Problem: My thread is too tight or too loose.
Did you thread it right? Make sure you threaded the machine with the presser foot up.
Check the number: There’s a number that controls how tight the thread is. A higher number is for thicker fabric. Make sure it’s right for what you’re sewing.
Bobbin check: Take out the bobbin and make sure it’s in the case correctly and threaded the right way (look at your machine’s book!).
Problem: My thread keeps getting stuck or making a bird’s nest underneath!
Safety first! Turn off your machine.
Take things apart: Remove the foot that holds the fabric down and the plate under the needle (you’ll need to unscrew them).
Look for fuzz: See if there are any loose threads or bits of fabric stuck in there.
Clean it out: Use a little brush to clean all the dust and fuzz, especially if you’ve been sewing things that make a lot of lint.
Put it back together: Carefully put everything back the way it was and make sure it’s all sitting right.
Recommendation and Value for Money
If You’re Just Starting Out:
Go with the Brother SE600. It’s a great pick because:
- It doesn’t cost as much.
- It has everything you need to learn how to sew and embroider.
- The screen and buttons are easy to understand and won’t confuse you.
- It works well for simple sewing and for trying out embroidery for the first time.
If You Know Your Stuff:
The Brother SE700 might be better for you if:
- You work with complicated embroidery designs that need a faster machine.
- You’ll like having a nicer screen that makes it easier to see and change designs.
- You use your machine a lot and will notice the improvements in how it works.
- You need some special things that the SE600 can’t quite do.
Tips and Tricks
Keeping Your Machine Happy (So It Lasts Longer):
- Clean after sewing: After you finish a few projects, clean the area where the bobbin goes. Use a vacuum cleaner to suck out dust and fuzz. Don’t use canned air! It can blow the fuzz deeper inside.
- Check for loose threads: If your stitches look weird, see if there are any threads caught in the parts that move the fabric (feed dogs).
- Keep it tidy: Clean the area under the needle plate, especially if you’re using fabric that makes a lot of fuzz.
- New needle, new project: Change your needle often, especially when you switch to a different kind of fabric.
Making Your Embroidery Amazing:
- Use the right helper: Always use a stabilizer (the stuff you put under your fabric) that’s right for the fabric you’re using.
- Sticky help: For fabrics that are hard to put in the hoop, try using a temporary spray that makes them a little sticky.
- Practice first: Before you embroider on your good fabric, try your design on a scrap piece.
- Go slow for details: If your design has lots of small parts, slow down the machine. This will make your embroidery look cleaner and more accurate.
Problems and How to Fix Them:
Problem: Thread Nesting (Big mess of thread under your fabric)
- Why it happens: The thread might be getting tangled.
- How to fix it: Make sure you threaded the machine correctly with the presser foot up when you started, but down when you begin sewing. Also, check that the bobbin is in the right way and the thread tightness (tension) is right for your fabric.
Problem: Skipped Stitches (The machine isn’t making all the stitches)
- Why it happens: Your needle might be old or bent. You might also be using the wrong kind of needle for your fabric, or the thread isn’t going through the machine correctly.
- How to fix it: Put in a new needle. Make sure it’s the right kind for your fabric. Double-check that you threaded the machine correctly and the thread tightness is right.
Problem: Embroidery Parts Don’t Line Up
- Why it happens: The fabric might not be tight enough in the hoop, or it might be stretching.
- How to fix it: Make sure the fabric is pulled tight in the hoop and you’re using the right stabilizer. Don’t stretch the fabric as you’re hooping it. For big designs, you can try using that temporary sticky spray to help keep the fabric in place.
Problem: Fabric Gets Stuck
- Why it happens: The fabric might have gotten caught in the parts that move it or under the needle plate.
- How to fix it: Turn off the machine! Take off the needle plate and gently pull out any fabric or threads that are stuck. Clean the area well before you put it back together.
Wrapping It Up:
So, when you look at the Brother SE600 and SE700, you see two good machines for sewing and embroidery. The SE600 is a winner if you’re just starting out and want a lot for your money. The SE700 takes things up a notch for people who need more power and better features.
Think about how much money you want to spend, how often you’ll use the machine, and what kinds of projects you want to do. No matter which one you pick, taking care of it, threading it right, and knowing how to fix simple problems will help it last for years of fun, creative projects.
With the advice in this guide, you should have a good idea of which Brother sewing and embroidery machine is the best fit for you — whether you go for the great value of the SE600 or the extra power of the SE700!
FAQs
Which machine is better for beginners?
The Brother SE600 is usually better for beginners. It costs less and has lots of features that are easy to learn without being too much. It’s good for starting out with both sewing and embroidery.
Can both machines use my own designs?
Yes! Both the SE600 and SE700 have a USB port. You can plug in a USB drive and use your own embroidery designs on either machine. This gives you tons more options!
How big is the embroidery area on each machine?
Both machines have an embroidery area of 4 inches by 4 inches. They both come with a hoop that’s also 4x4 inches. This size is good for most decorations and small designs.
How do I fix thread that’s too tight or too loose?
You can change the thread tightness using a dial on the machine.
If the thread on the bottom of your fabric looks loopy (too loose), turn the dial to a lower number.
If the thread from the bobbin is showing on the top of your fabric (too tight), turn the dial to a higher number.
Always try this out on a scrap piece of fabric first to get it right before you sew your real project.
Can I use these for quilting?
Yes, you can do some basic quilting with both machines. They have a way to lower the feed dogs (the parts that move the fabric) so you can move the fabric freely for quilting. They also have enough space to work on small to medium-sized quilts. If you plan to do a lot of big quilting projects, there are machines made just for that that might be better.
How do I clean and take care of these machines?
You should clean the bobbin area after you finish a few projects. Use a vacuum cleaner to suck out any dust and fuzz. Don’t use canned air! It can blow the dirt further into the machine. Take off the plate under the needle sometimes to clean out any fuzz around the parts that move the fabric and where the bobbin goes. You should also follow the instructions in your machine’s book for oiling it.
About the Creator
Imran.Bin.Ilias
I am new to Vocal Media. Discuss making money from home. Let's review comparing products to see what's best for you. Feel free to join, and I will join for lovings.
Keep reading
More stories from Imran.Bin.Ilias and writers in Confessions and other communities.
Ninja Creami 10 in 1 Vs 11 in 1: Which Is Better?
Confused between the Ninja Creami 10-in-1 and 11-in-1? You’re not alone. These models look the same, work the same, and offer the same delicious frozen treats — but the names can be misleading. The truth? They’re identical machines. The only difference is how retailers count the features. Some list “Mix-ins” as a separate function (11-in-1), while others don’t (10-in-1). In this post, we’ll break down what really matters so you can buy with confidence.
By Imran.Bin.Ilias10 months ago in Confessions
The Piggy Project
I’ve had so many names in this life I lose track of which ones were ever really mine and which ones I wore because someone needed me to. Some were handed to me before I had words to refuse them, before I knew what they meant, before I knew I could say no. Most weren’t meant to hurt. That doesn’t mean they didn’t leave marks. Marks that told me who I belong to, who I am by way of who claims me, recognizes me in the good and bad, who walks beside me.
By Fatal Serendipity3 days ago in Confessions
Emotional Intelligence Practices That Improve Intimacy And Connection
The first component of emotional intelligence is self-awareness which is the capacity to be able to correctly identify and interpret personal feelings. In the absence of this, intimacy will be shallow since feelings that are not reviewed tend to cause confusion or defensiveness. Self-awareness is about regularly monitoring yourself, recognizing your emotional triggers, and recognizing patterns of your response to stress or love. This skill is enhanced by journaling, conscious reflection, and self-questioning. Once you get to know your emotional terrain, you express yourself more effectively and minimize projection. The development of self-awareness changes reactive habit into deliberate reply, which preconditions intensified intimacy and genuine connection in relations.
By Grace Smith7 days ago in Confessions
A More Human Vocal
When we launched Vocal nearly a decade ago, the world was a very different place. LLMs did not exist, and stories were created one at a time by people sitting down to write, revise, and share something personal. Many of our assumptions about publishing, trust, and participation were built for a world where effort and output were inseparable.
By Justin @ Vocal3 days ago in Resources


Comments (1)
Valuable!!!