
How to Seal Mylar Bags: A Complete Guide for Long-Term Storage
Mylar bags are a popular choice for storing food, emergency supplies, and other items that require long-term protection from moisture, oxygen, and light.

Introduction:
Mylar bags are a versatile and reliable solution for preserving food, emergency supplies, and other items that need protection from moisture, oxygen, and light. Whether you're preparing for long-term food storage, safeguarding important documents, or organizing survival kits, knowing how to properly seal Mylar bags is essential. This guide will walk you through the process step by step, ensuring your items stay fresh and protected for years to come.
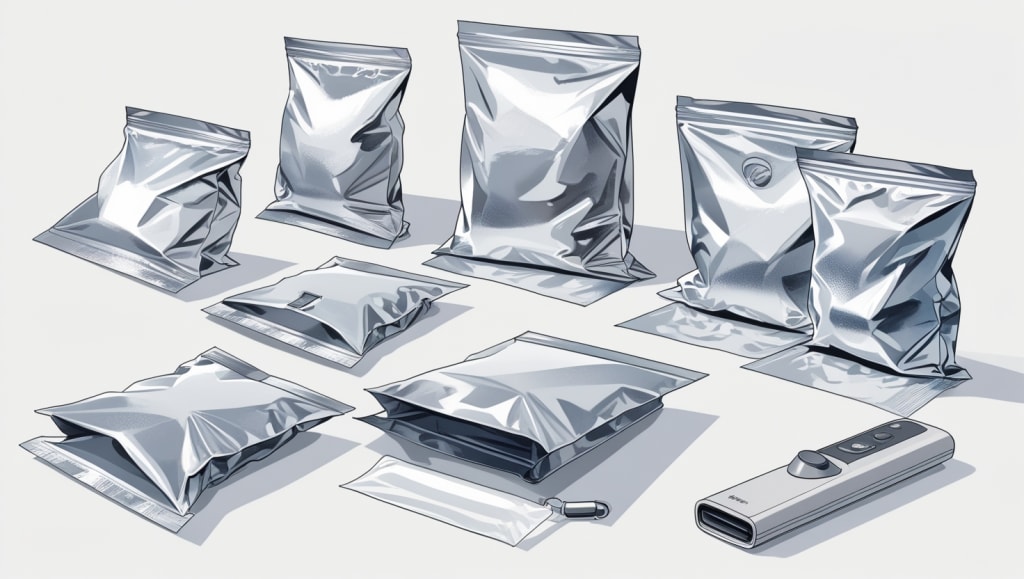
What Are Mylar Bags?
Customized Mylar bags are made from a durable polyester film that provides an excellent barrier against air, moisture, and light. They are commonly used for food storage, especially for items like grains, beans, and dehydrated foods, as well as for protecting sensitive materials like electronics, documents, and medical supplies. When sealed correctly, Mylar bags can extend the shelf life of food items for up to 25 years or more.
Why Proper Sealing Matters
A proper seal is critical to the effectiveness of Mylar bags. If the seal is incomplete or compromised, air and moisture can seep in, leading to spoilage, mold, or degradation of the contents. By following the correct sealing process, you can ensure your items remain safe and preserved for the long term.
What You’ll Need:
- Before you begin, gather the following materials:
- Mylar bags (choose the appropriate size for your contents)
- Heat sealer (or a household iron/hair straightener as an alternative)
- Oxygen absorbers (optional, for food storage)
- Contents to store (e.g., food, supplies, or documents)
- Parchment paper (if using an iron or hair straightener)
Step-by-Step Guide to Sealing Mylar Bags
1. Prepare the Bag
Start by selecting a clean, dry Mylar bag. Ensure there are no tears or holes in the bag.
Fill the bag with your desired contents, leaving about 1-2 inches of space at the top. Overfilling the bag can make it difficult to achieve a proper seal.
2. Add Oxygen Absorbers (Optional)
If you’re storing food or other oxygen-sensitive items, add oxygen absorbers to the bag. These small packets help remove oxygen, which can cause spoilage or rancidity. Use the appropriate size and quantity based on the volume of the bag. For example, a 300cc oxygen absorber is typically suitable for a 1-gallon Mylar bag.
3. Remove Excess Air
Gently press the bag to remove as much air as possible. For better results, use a vacuum sealer to extract air more effectively. Removing air helps create a tight seal and prevents the bag from expanding due to trapped oxygen.
4. Fold the Top of the Bag
Fold the top of the Mylar bag over to create a clean, flat edge. This step ensures the sealing area is smooth and free of wrinkles, which can interfere with the sealing process.
5. Seal the Bag
Using a Heat Sealer: Place the folded edge of the bag into the heat sealer and press down firmly. Hold for a few seconds until the seal is complete. Most heat sealers have an indicator light or sound to let you know when the seal is finished.
Using an Iron or Hair Straightener: If you don’t have a heat sealer, you can use a household iron or hair straightener. Set the iron to a medium heat setting or the hair straightener to around 300°F (149°C). Place the folded edge of the bag between two sheets of parchment paper to protect the Mylar from direct heat. Press firmly for 5-10 seconds to create a seal.
6. Check the Seal
After sealing, inspect the bag to ensure the seal is tight and secure. Run your fingers along the sealed edge to check for any gaps or wrinkles. If the seal feels weak or uneven, reseal the bag.
7. Double-Seal for Extra Protection (Optional)
For added security, consider double-sealing the bag. Simply create a second seal just below the first one. This extra step can help prevent leaks and ensure the contents remain protected.
8. Label and Store the Bag
Once sealed, label the bag with the contents and the date of storage. This step is especially important for food storage, as it helps you keep track of shelf life and rotate supplies as needed.
Store the Mylar bag in a cool, dry place away from direct sunlight. For added protection, place the sealed bags in a sturdy container or bin.
Tips for Success
Choose the Right Size Bag: Using a bag that’s too large or too small for your contents can make sealing more difficult. Select a size that allows for proper filling and sealing.
Use Quality Materials: Invest in high-quality Mylar bags and oxygen absorbers to ensure the best results.
Avoid Overfilling: Leave enough space at the top of the bag to create a proper seal.
Test the Seal: Before storing valuable items, test your sealing method on an empty bag to ensure it works effectively.
Common Mistakes to Avoid
Incomplete Seals: Failing to create a tight seal can allow air and moisture to enter the bag, compromising the contents.
Using Damaged Bags: Always inspect Mylar bags for tears or holes before use.
Skipping Oxygen Absorbers: For food storage, oxygen absorbers are essential to prevent spoilage and extend shelf life.
Conclusion:
Sealing Mylar bags is a simple yet crucial process for preserving food, supplies, and other items. By following this step-by-step guide, you can ensure your Mylar bags are properly sealed and ready for long-term storage. Whether you’re preparing for emergencies, organizing your pantry, or protecting important documents, Mylar bags offer a reliable and effective solution. With the right tools and techniques, you can confidently store your items and enjoy peace of mind knowing they’re safe and secure.
About the Creator
Larry Clark
I am a dedicated and skilled professional specializing in custom packaging solutions. With a deep understanding of packaging design, I focus on creating high-quality, tailored boxes for cakes, food, and cosmetics.
Keep reading
More stories from Larry Clark and writers in Cleats and other communities.
How to Improve Your Packaging: 10 Best Practices for Every Industry
In today’s competitive market, packaging is no longer just a protective shell for products—it’s a powerful tool for branding, customer engagement, and sustainability. With e-commerce booming and consumers prioritizing eco-conscious choices, businesses must rethink their packaging strategies to stay relevant. Whether you’re in food, retail, electronics, or healthcare, these ten best practices will help you elevate your packaging game.
By Larry Clarkabout a year ago in History
Shadow Fist: A Gritty Independent MMA Drama From Andreas Szakacs Productions
At first glance, Shadow Fist appears to be a gritty mixed martial arts drama set in the underground fight scene of Mexico City. But beneath the punches, bruises, and adrenaline of the ring lies a deeper story—one about resilience, identity, and the difficult journey toward redemption.
By Andreas Szakacs5 days ago in Cleats


Comments
There are no comments for this story
Be the first to respond and start the conversation.