
Ombre Nails: 5 Trendy Styles To Experiment With
5 Trendy Styles of Nail Fashion
Nail art has seen a surge in creativity and popularity over the years, with ombre nails being one of the standout trends. This gradient technique blends two or more colors seamlessly and adds a sophisticated touch to any look. Ombre nails can be as subtle or bold as you desire, making them versatile for various occasions.
Whether you prefer a classic fade or a more intricate design, there’s an ombre style to suit your taste. Let us explore five trendy ombre nail styles you should experiment with. Each style offers a unique twist on the traditional gradient, ensuring your nails always make a statement.
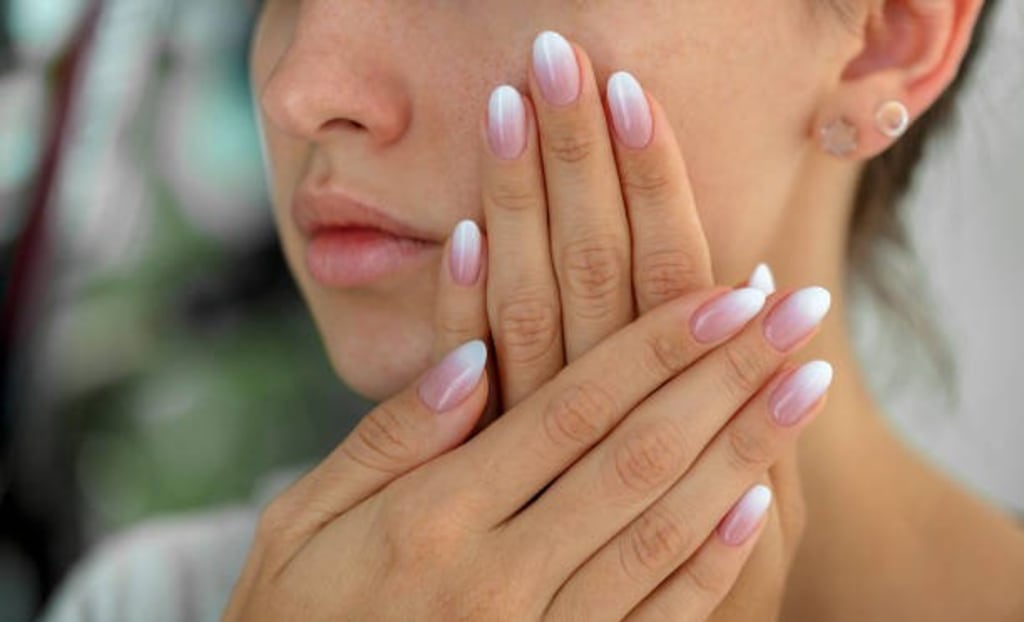
1. Classic Ombre Fade
The most often used and simple ombre nail design is the classic one. This technique combines two complementary hues by usually beginning with a lighter shade at the base of the nail and working toward a darker shade at the tip. Dabbing the colors onto your nails with a sponge can help you achieve this look and provide a flawless gradient effect.
This approach guarantees a flawless color change, enhancing your nails’ sleek and elegant look.
You can personalize the traditional ombre fade in several ways. Choose subdued nudes and pastels for a more subdued style; use stronger hues like red and black for a dramatic impact. Because of its ageless appeal and versatility, the traditional ombre fade stays an overall favorite.
2. Glitter Ombre
The glitter ombre nails are an excellent option for everyone who enjoys some glitter. This approach glows your nails by including glitter in the gradient. Beginning with a solid base color, progressively add glitter from the mid-section to the tips of your nails. This produces a remarkable effect that brilliantly catches the light.
Glitter ombre nails are perfect for celebrations, holidays, or any event where you wish your nails to be distinctive. The great thing about this approach is its adaptability; you can match your outfit or mood with any color combination or glitter. Whether your choice is a subdued shimmer or intense glitter, this ombre look will stand out.
Either loose glitter or glitter polish will help create a glitter ombre. Loose glitter offers more control over the gradient’s intensity, while glitter polish provides a more equal distribution. Start with a base coat to guard your nails and guarantee the polish stays on. Once the base color dries, apply a layer of glitter polish from the mid-section to the tips using a sponge for a more dispersed look.
3. Reverse Ombre
Reversing the color gradient gives the classic ombre appearance a modern spin. This style begins with a darker shade at the base of the nail and fades into a lighter color at the tip rather than from light to dark. The same sponging process used in the conventional ombre will help you get the reverse ombre.
Those wishing to change and try something different will find this style perfect. Strong color selections for the reverse ombre are especially striking since the darker base produces a dramatic and eye-catching impression. This type is ideal when you want to elevate your appearance or for evening activities.
However, to discover what best fits your style, try several color combinations, including navy blues mixed into baby blues or deep purples fading into lilacs. The unusual color arrangement of the reverse ombre gives a contemporary spin on the traditional gradient, making your nails stand out in any outfit.
4. Pastel Ombre
Pastel ombre nails are a beautiful and soft variation of the traditional ombre. This style uses light, pastel colors to create a delicate, dreamy gradient effect. Pastel ombre nails are perfect for spring and summer, evoking a sense of freshness and tranquility. To achieve this look, choose pastel shades that complement each other, such as baby pinks, blues, and lilacs.
With its subdued but sophisticated look, the pastel ombre is appropriate for both daily wear and formal events. This approach is also flexible enough to match various nail lengths and shapes, guaranteeing that your nails always look fashionable and neat.
Making a pastel ombre requires a little touch to guarantee the colors mix naturally. Start with a base coat to guard your nails, then use a light pastel color. Apply a second pastel shade with a sponge, blending from the mid-section to the tip once the foundation color dries. Repeat this process using different colors so every layer dries before adding the next.
5. Neon Ombre
The neon ombre is a must-try for those who love bold and vibrant colors. This style uses bright neon shades to create a striking, energetic gradient effect. Neon ombre nails are perfect for summer festivals, beach outings, or any occasion you want to make a bold statement.
To achieve this look, select neon colors that blend well, such as neon pinks, greens, oranges. The neon ombre will turn heads and add a fun, playful touch to your look. This style is perfect for confident people who love experimenting with bold, unconventional colors.
Creating a neon ombre requires vibrant neon polishes and a bit of creativity. Start with a white base coat to make the neon colors pop. Once the base is dry, use a sponge to apply the first neon color from the base of the nail, blending upwards.
Add neon shades as desired, overlapping slightly to create a smooth transition. Seal the design with a clear top coat to enhance the shine and longevity. Neon ombre nails can be further elevated with fun nail art, such as geometric patterns or tropical decals, to amplify the bold and lively effect.
Conclusion
From the traditional ombre fade to the strong neon ombre, ombre nails provide various designs to fit many preferences and events. Every style lets your nails reflect your individuality and artistic ability. Try these fashionable ombre nail designs to maintain a solid and chic manicure.
About the Creator
Tatt~Master
— Assembly Line Tatt Machine ~ Impressions to Impress — As I begin to understand more about the Tattoo Phenomenon. I've written silly, yet verbatim, dating site anecdotes in 'Frazzled.' So let me ask you: Would you be More attracted to someone slathered with tattoos, or Less?
By Jay Kantor4 days ago in Humor


Comments
There are no comments for this story
Be the first to respond and start the conversation.