
How to Increase Video Quality on CapCut
"How do I make my CapCut video high quality? Is there any easier way to increase video quality than CapCut?"

The quality of your video can have a huge impact on how viewers perceive it; after all, if the image is too pixelated or blurry, it can be hard to appreciate the finer details. CapCut, a free and powerful video editor, has gained more attention for its convenience for beginners and with the popularity of TikTok. If you’re working with CapCut and want to take advantage of its great editing capabilities while also achieving maximum picture clarity and resolution, then you’re in luck, this blog post will show you how to increase video quality on CapCut no matter what kind of device or platform it’s put out on, as well as introduce you to a much easier way to increase video quality with a few clicks using AVCLabs Video Enhancer AI.
Part 1: Why Increasing Video Quality is Important
High-quality video streaming is essential for an enjoyable viewing experience. High-definition (HD) and Ultra HD or 4K resolution videos provide enhanced clarity, improved color accuracy, and more precise detail than standard definition videos. This makes it easier to spot minute details on the screen, such as facial expressions, intricate textures in clothing and landscapes, landscapes that appear realistic, and vibrant colors that make images look lifelike. Additionally, high-resolution videos are much sharper when viewed on larger screens like TVs or projectors.
More importantly, higher video quality can also improve user engagement by reducing buffering time. A low-quality stream requires fewer bits of data to transmit but takes longer to buffer since the data rate is lower than a higher-quality stream. High-definition streams require more data and thus take longer to buffer initially, but because of the higher bitrate, they will be less likely to stutter or freeze during playback due to buffering issues.
Finally, using high-quality video streaming technology also allows you to reduce bandwidth costs by eliminating unnecessary replays and delays caused by low-quality streams. This reduces both storage space requirements and hosting costs.
Part 2: How to Increase Video Quality on CapCut?
CapCut is a powerful video editor that enables users to quickly edit and enhance videos. It’s packed with features like camera tools, filters, transitions, music tracks, and more — all designed to help you make your creations look their best. You can select from a wide range of customizable themes or create your look with hundreds of filters, transitions, and music tracks to choose from.
Step 1: Run CapCut
Download CapCut to your PC, then simply double-click and run. Signing in is easy too; you can use TikTok, Facebook, or Google account credentials. If you log in via TikTok, sharing the video afterward will be a breeze.

Step 2: Add the Video
Click New project to start your work. Tap the Media section and click the Import button to add the videos you want to enhance.

Step 3: Add Effect to the Video
Drag the video to the timeline and start to create. Click on the Effects-Video effects, go to the Comic section find the B&W Sketch effect, add it to the timeline, and match it to the video. Then find the Blur effect in the Lens section and drag it to fit the video. If you are running the CapCut before V 1.5.0, you may find this effect under the Basic or opening & closing section. Finally, click the Export button to save it to your desktop.

Now, delete the B&W Sketch on the timeline, and replace it with the Neon effect in the Comic Section. Then export it to the desktop.

Step 4: Import the Two Processed Videos as Overlays
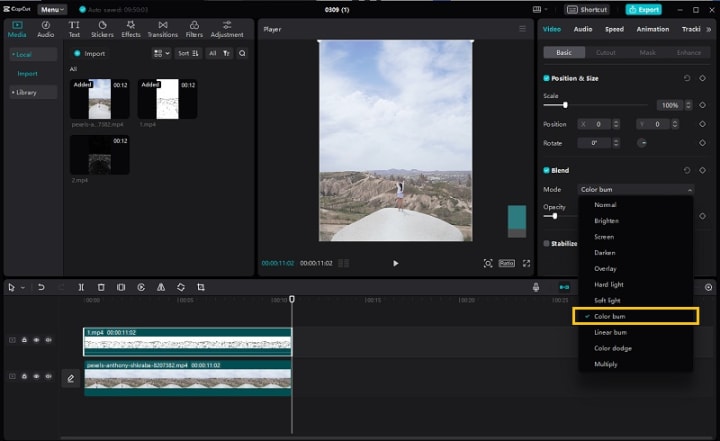
Go back to the workplace and remove all the effects from the timeline but retain the original video. Import the two processed videos to the media. Drop the first exported video, which is the one with the black-and-white sketch effect. Then go to the right side Basic-Blend part, click the drop-down menu, and choose Color Burn. You can adjust the opacity to make the picture more natural.
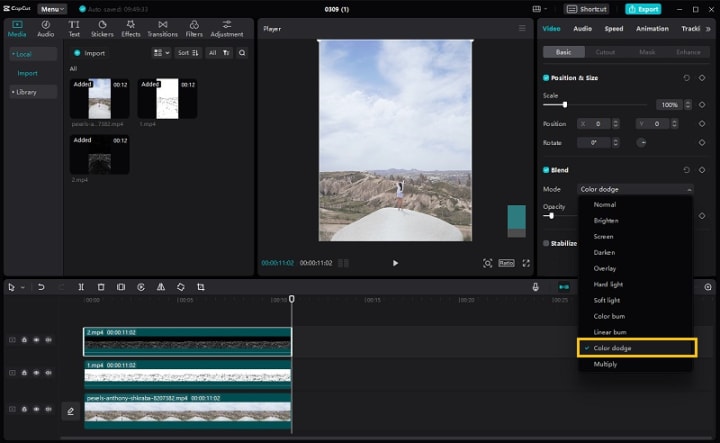
Drag and drop the video with the neon effect added to the timeline and choose Color Dodge. Likewise, adjust the opacity to make it look better.
Overlaying both of these effects is intended to enhance the sharpness of the video, thereby improving the visual quality, which is particularly useful for videos that may appear blurry.
Step 5: Adjust the Color Settings of the Video
To increase the video quality on CapCut, you need to make some manual adjustments to the color settings to improve brightness, saturation, and contrast - this will make it look more vibrant and captivating for viewers.
Click on the Adjustment tab and select Custom Adjustment. Match it to the whole video. Under the adjustments panel, you will find two sections: basic and HSL. Both of these sections can be used to adjust the hue, saturation, and lightness of the video. There are no fixed parameters and the adjustments should be made according to the specific needs of each video. This process may require some trial and error, so take your time to achieve the desired results.

Step 6: Export the Final Video
Now you can click on the play button to preview the final result. Afterward, simply click on the export button, choose your desired output resolution, and export your project with ease.

Part 3: The Limitations of Increasing Video Quality with CapCut
Despite its many great features, increasing video quality with CapCut has certain limitations.
1. The operation steps are relatively complex and time-consuming
Although CapCut has a lot of preset effects, which is more friendly for beginners to edit videos. However using CapCut to increase video quality involves adjusting the brightness, contrast, saturation, and other colors of the video, and this requires the user to have some experience and knowledge of editing videos. Otherwise, you have to keep trying until you get a satisfactory result. This process is time-consuming and tests the user's patience.
2. It is not suitable for videos with a lower original resolution
One thing to be clear is that CapCut can only increase the quality of videos that suffer from poor light conditions or other similar issues. Adjusting various picture settings can improve the overall visual effect of the video. However, it should be noted that CapCut is not capable of removing or repairing elements such as burrs, artifacts, noise, mosaic, etc. in instances where the source material has been damaged due to poor capture equipment, poor network environments, screen shake, and other similar factors.
Therefore, if the source video is particularly blurry, even if the output resolution is set to 1080P or 4K, the blurry video will not be changed at all.
Part 4: A Much Easier and More Effective Way to Increase Video Quality with a Few Clicks
To significantly increase the quality of a video, utilizing AI video enhancement technology is a far easier and more efficient means than relying on a traditional video editor like CapCut.
AVCLabs Video Enhancer AI is an innovative AI-driven technology that enables you to produce high-quality videos with remarkable clarity, without the need for expensive software or prior editing knowledge. It employs advanced algorithms that are consistently updated to guarantee the optimum output quality for every media file you upload. Moreover, it supports a wide range of multimedia file formats and codecs, including MP4, AVI, WMV, MOV, FLV, and more.
With AI video upscaling, you can enlarge HD videos to 4K using a creative approach that takes advantage of information from different frames. This powerful software produces enlarged and more detailed images than those captured originally, without compromising on quality. Additionally, super-resolution algorithms enable computers to generate high-resolution outputs with remarkable accuracy by combining low-resolution images.
How To Increase Video Quality With AVCLabs Video Enhancer AI
Before downloading AVCLabs Video Enhancer AI on your computer, please check the system and hardware requirements of the program.
Step 1: Download AVCLabs Video Enhancer AI
Download and install AVCLabs Video Enhancer AI from the provided link, then launch it.

Step 2: Upload Low-Quality Videos
Just click the "Browse" button or drag and drop your videos that need to be enhanced into AVCLabs Video Enhancer AI. You can process up to 3 videos for free with its trial version.
Step 3: Select AI Upscaler Model and Configure Settings
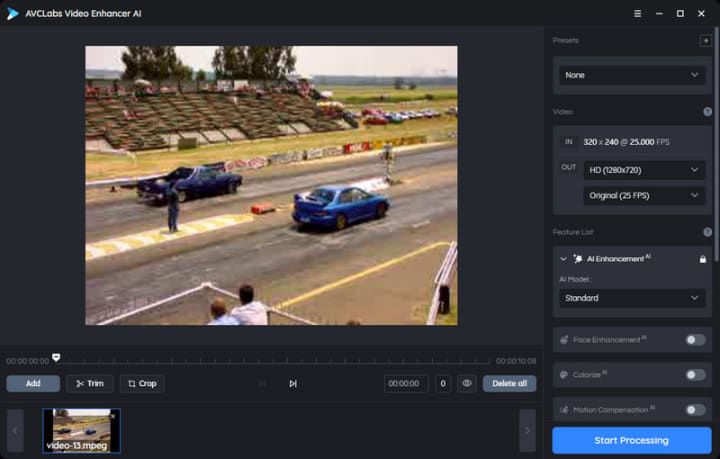
There are three AI features AI Upscaler to upscale video from SD to HD or 4K and even 8K; AI Denoise to remove noise and artifacts from the video; and AI Colorize to bring your old black and white video to life. Choose a different AI model based on your needs. This post will take AI Upscaler as an example to show you how to increase video quality.

1. Model settings: Once you have selected the AI features, click on the button to select the upscale model (standard is the default model; however, you can adjust it based on your device's setup). Additionally, you can choose whether to enhance facial details in your videos by ticking the box for Face Refinement. With this feature enabled, AI will automatically detect and sharpen facial details without sacrificing quality.

Note: Make sure to check what type of hardware acceleration (if any) is available on your device before changing upscaling models. This will ensure that any changes made don't exceed what your device can handle. Additional hardware acceleration may be required for maximum performance.
2. Video settings: this part gives you more control over your video. You can adjust the brightness, saturation, and contrast or crop the video to fill the frame and deinterlace to reduce horizontal lines in the video.

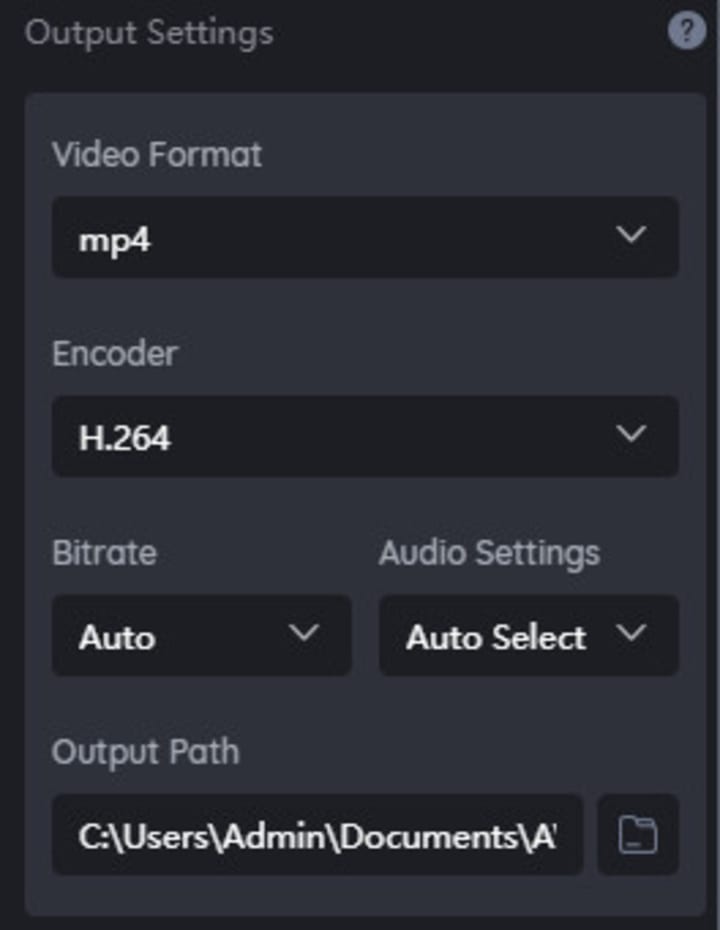
3. Output settings: Select any output video format you would like; MP4, MKV, AVI, and more formats are available. You can also specify the output path wherever you want the video to be saved. And choose the upscaled resolution.
Step 4: Start Increasing the Video
Once the settings are complete, click the Play button to review 30 frames to make sure the processed video is what you want. Finally, click the Start Processing button to increase video quality.

Conclusion
Whether you are creating videos for YouTube or personal use, increasing video quality can be a challenge without knowing which settings need to be adjusted. By following these steps—selecting a higher resolution option, adjusting brightness/contrast settings, and rendering in a higher bitrate format—you can easily increase video quality on CapCut! If you're looking to increase video quality in an easier and faster way, then the AVCLabs Video Enhancer AI might be the solution for you. This AI-based tool can automatically enhance videos with just a few clicks, so you don't have to manually adjust resolution, brightness/contrast settings, or render bitrate formats yourself. It even supports high resolutions up to 8K, which is perfect if you're creating YouTube videos! So try out this helpful tool and see how it can make your videos look better in no time!
About the Creator
Chloe Huang
Dedicated to sharing a variety of useful technical tips~
Keep reading
More stories from Chloe Huang and writers in 01 and other communities.
AI License Plate Recognition: How to Track and Blur Moving License Plates in a Video
Blurring license plates in video content is essential for safeguarding individual privacy and ensuring compliance with legal and ethical standards. While traditional manual blurring methods within video editors exist, the integration of artificial intelligence has streamlined and improved the process significantly. Now this article will introduce an automated solution using AI License Plate Recognition technology to efficiently blur stationary or moving license plates in video footage.
By Chloe Huang2 years ago in 01
Multi Directional Forklift: The Future of Flexible Warehouse Handling
Modern warehouses and logistics centers rely heavily on efficient material‑handling equipment. Among the many machines used in warehouses, the Multi Directional Forklift stands out as one of the most versatile solutions for handling complex loads in tight spaces. As storage facilities become more compact and demand faster operations, businesses are increasingly adopting advanced forklifts that maximize space, safety, and productivity.
By charliesamuel5 days ago in 01
Choosing the Right AI Consulting Agency in 2026: A Smart Business Leader’s Guide
Introduction In 2026, partnering with the right AI Consulting Company can be the difference between leading your industry and falling behind. As artificial intelligence becomes deeply embedded in operations, marketing, customer service, and decision-making, choosing a trusted AI Consulting Agency in USA is no longer optional — it’s strategic. With countless providers offering AI Consulting Services, businesses must carefully evaluate expertise, scalability, compliance readiness, and real ROI potential before making a commitment.
By MUHAMMAD SHAFIE7 days ago in 01
The Politics of Playing Dress-Up
Well, to start off I'd like to say a happy world book day to all who celebrate. I know I haven't really posted anything on my socials about it but I'm not a jubilant kind of person. I lay low most of the time. Let's start off with a popular anecdote from the vaults...
By Annie Kapur6 days ago in Geeks


Comments
There are no comments for this story
Be the first to respond and start the conversation.