
How to Create a Website?
A detailed and Step-by-Step Guide for Beginners.

‘How to Create a Website?’ – is one of the most commonly asked questions on the internet. A website is a great way to provide value-added services to your audience and clients. Nowadays, it’s mandatory to have a website to run a business more professionally.
It has become very easy to create a website these days. With a catchy Domain and a Hosting Plan from the Best Hosting Provider, anyone can create a website in 2-3 hours without coding or technical knowledge. Here is a step by step guide that will help you to create a website.
1. How to Create a Website?
First of all, you should determine the primary purpose of your website. There are three things you need to build a successful website.
1.1. Domain Name
It’s a simple step but sometimes becomes the most challenging part for some people because it’s the URL you’ll share with your customers. However, it should be easy to remember.
1.2. Website Hosting
The host is a server where all data of your domain stores. The domain name and web hosting assure your data is accessible to others. For a small business, it’s too expensive to host your own website, so it’s a good idea to buy an external host.
There are many options when it comes to the best hosting provider. All web hosting companies will claim to give you the best server and unlimited resources, but when you signup with them, you will immediately face many issues. For this reason, you have to be careful while choosing your web hosting company.
1.3. WordPress
It’s good to publish your website on WordPress. It is a completely free to use CMS platform. In addition, it has many customized designs that will make your website look professional.
2. How to Connect your Domain Name to your Hosting Account?
Once your domain name is registered, you need to connect it with the hosting server. For this, you have to follow these steps:
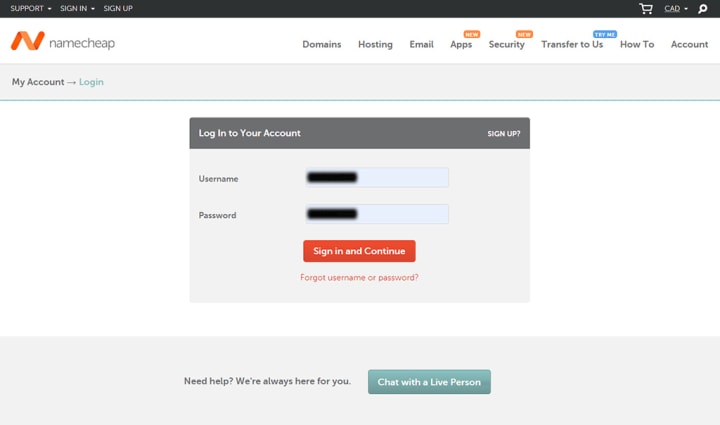
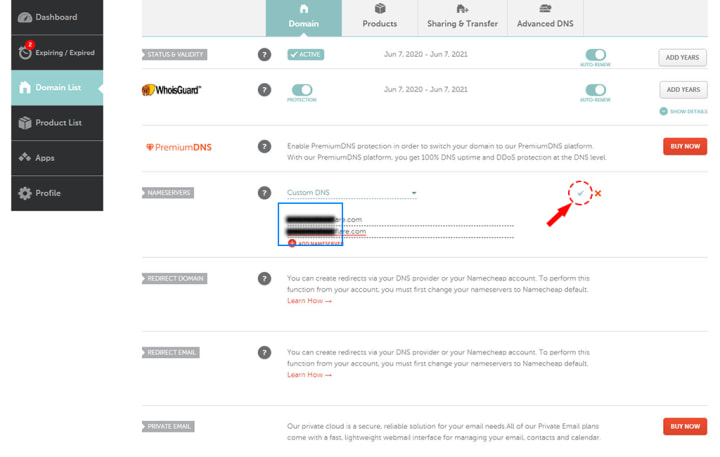
2.1. Log in to Namecheap or any other Domain provider.
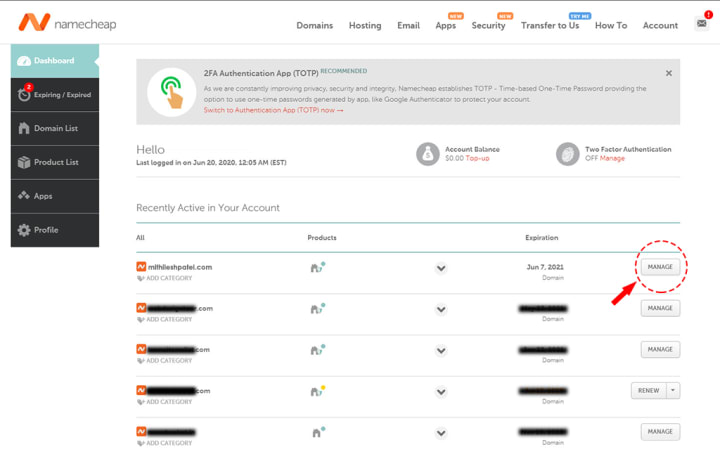
2.2. Go to Manage DNS for the selected domain.
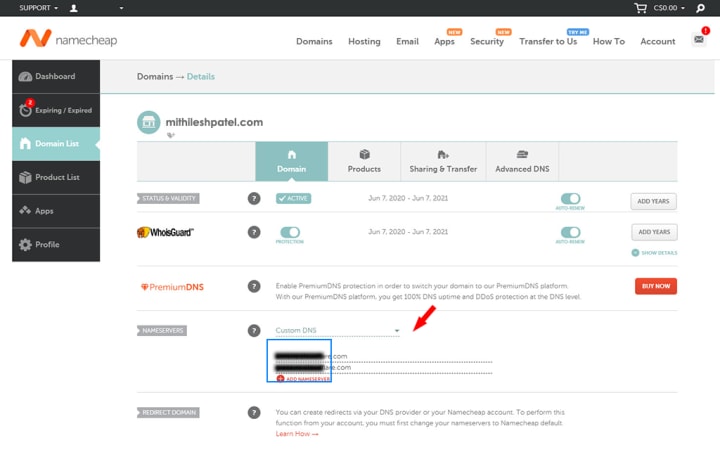
2.3. Scroll to Nameservers.
2.4. Now, log in to your cPanel account, and Copy the nameservers associated with your Hosting account (You can also copy your Hosting nameserver details from the welcome email).
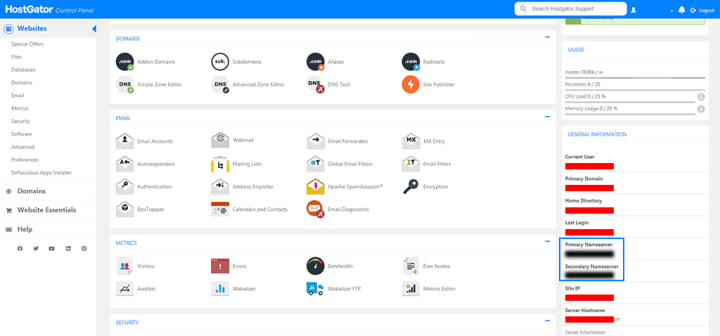
2.4.1. You can use Cloudflare as a mediator between your domain and hosting providers. It will enhance your website security. In order to use it, Read What is Cloudflare and How to use it?
2.5. Paste those nameservers in the Custom field in your Domain Account (here Namecheap, Step 2.3).

2.6. Once you are done with Copy-Paste, simply Save it by clicking on the tick icon. It may take a few hours to get your website ready.
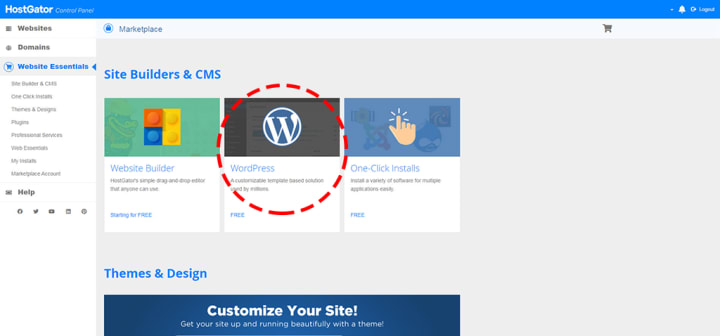
3. Installing WordPress
WordPress can be used by professionals as well as a newbie who wants to develop a website. Here are some steps you should follow to install WordPress on any platform.
3.1. Download and unzip the WordPress package from the official WordPress Website.
3.2. Upload WordPress to Hosting Account. You can upload unzipped files directly through cPanel using the File Manager.
3.3. Create MySQL Database and User. Log into cPanel. In the Databases section, click the MySQL Database Wizard icon.
3.4. Configure wp-config.php. Make sure the correct database information is associated with the WordPress installation.
3.5. Run the WordPress installation script by accessing the https://example.com/wp-admin/install.php.
3.6. Your WordPress installation will be completed.
3.7. Alternatively, (to skip this manual step by step method), You can use One Click Install (offered by almost all Hosting providers) to automatically install WordPress for your domain, including your database.
4. Choose Themes
WordPress offers the best themes that suit every kind of business. There are thousands of free and paid themes available on WordPress.

4.1. Free Themes
If you want a free theme, you should go with the popular themes section. It’s up to your choice to browse any theme from it and apply it to your website.
4.2. Paid Themes
In WordPress, you can also buy themes of your choice by keeping in mind about your website requirements. You can buy it from the WordPress Dashboard or any other 3rd party website. You have to manually upload 3rd party theme (both free and paid).
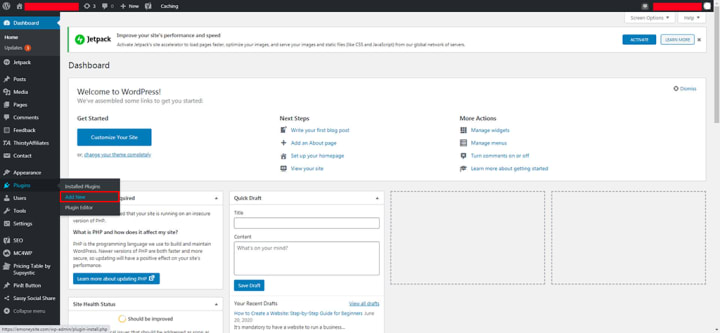
5. Installing Plugins
Plugins are bits of software that can be installed to add more functionality to your website. To install plugins, you need to put a plugin file in the wp-content/plugins directory. After plugin installation, your site functionality will boost. You can also find and install the plugin from the Dashboard similarly to Themes.
6. Customized your Website and Add Content
Don’t stay so far from the basic structure. Before your site is live on the web, make sure that it can be run on any browser. After you are done customizing your site template, add content, and publish your website. You will finally have your website live on the web!

Final Thoughts
So, that’s the end of the tutorial. I hope you will find it helpful and informative. Do share with your friends and family. Please let me know (via comments) if you come across any issues.
About the Creator
Mithilesh Patel
After completing B.Tech from NIET and MBA from Cardiff University, I did Journalism. In 2018, I started ‘Five Alphabets’ - A digital Agency dealing with Websites, Themes, Android Apps, Google Maps and YouTube.
Keep reading
More stories from writers in 01 and other communities.
Exploring the FinTech Innovation Behind Buy Now Pay Later Solutions
Introduction In recent years, Buy Now Pay Later (BNPL) solutions have emerged as one of the most influential innovations in the FinTech ecosystem. By allowing users to split payments into manageable installments, BNPL platforms have changed how consumers interact with digital commerce. What appears simple on the surface is actually powered by a sophisticated mix of financial logic, modern software architecture, and advanced data technologies. Understanding the innovation behind BNPL solutions offers insight into why they have gained rapid global adoption and how they continue to evolve.
By Nayel Basim Al Shehhi3 days ago in 01
The Rise of AI Gigafactories: What They Are and How They Operate
Artificial Intelligence has become a defining force in technology, industry, and economic competition. That’s why every country wants to position itself as a leader in providing AI-ready compute infrastructure. And the European Union (EU) knows it can’t just afford to sit on the sidelines. So, Europe has taken a big step forward with something called AI Gigafactories to strengthen technological sovereignty.
By Shikharsparx5 days ago in 01
The Path to Salvation
The late autumn evening air filled the monk's lungs, but it wasn't the season that chilled his bones. The heavy-handed presence of evil he had sensed upon entering the woods surrounding this mountain village had not bothered to conceal itself from him.
By Made in DNA4 days ago in Fiction


Comments
There are no comments for this story
Be the first to respond and start the conversation.