
Here's How You Back Up Your Gmail
It's never been more important to back up Gmail emails. With hackers constantly looking for account weaknesses, it's possible that your email account could become compromised.

. Messages could be lost. You might even lose access to your Gmail account. If that happens, you'll want to have a good Gmail backup.
Many of us keep business information in our Gmail email accounts. Losing that information could be quite costly. That's why it's important to make sure that data isn't lost.
There are several ways to back up Gmail emails, but many Gmail users don't understand what to do. In this tutorial, you'll learn how to back up Gmail. We'll explain how to use the Google backup utility (Google Takeout) to back up your Gmail. We'll also discuss a few third-party Gmail backup utilities.
Learn Helpful Email Tips and Strategies
Before we tackle Gmail backups, don't forget to sign up to the Tuts+ Business newsletter and grab our free eBook: The Ultimate Guide to Inbox Zero Mastery. It's packed wth inbox organization strategies and killer tips for managing all your incoming email more efficiently.
1. Why You Need Gmail Backups
Your Gmail contains important business information. Customers and future customers use it to contact you. It may even contain sensitive project information.
But what if your email messages were lost or compromised?
The truth is that email accounts and other online accounts are hacked into all the time. The news is filled with accounts of data breaches and other security failures. If someone else had access to your email account, it's possible you could lose some of those important business communications.
While setting up strong Gmail passwords can help reduce the chances that a hacker will get into your email, no system is foolproof. In a worst-case scenario, you may even need to delete your Gmail account if it is compromised. For guidance on how to do that, follow the steps in this tutorial:
And of course, there's user error. Nobody likes to think about it, but data is often lost when a user accidentally deletes a Gmail message. If you act quickly, you may be able to restore a deleted message. But if some time has passed and you've got no Gmail backup system in place, you may have lost that message forever. For instructions on how to retrieve deleted Gmails review the tutorial, How to Retrieve Your Deleted (Or Archived) Emails in Gmail.
Having up-to-date Gmail backups allows you to restore your lost emails should anything ever happen to your Gmail account. There are several methods you can use to back up your Gmail account.
2. How to Backup Gmail Emails With Google Takeout
Google Takeout creates a copy of your entire Google Account, including your Gmail data. To use it, here's what to do:
1. Start by typing https://takeout.google.com/settings/takeout in your browser's Address field. If you're not signed into your Google account, you must sign in before you can use the utility. If you're signed in, the Google Takeout screen appears:
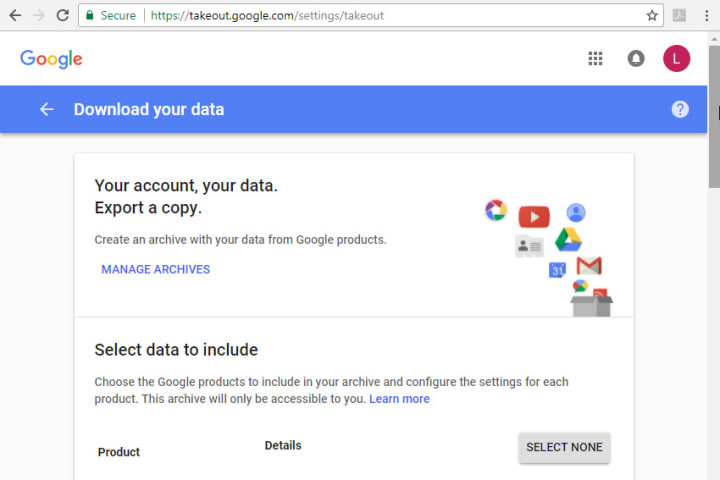
2. Use the scroll bar on the right of the screen to view the list of data that you can back up with the utility:
You'll see all the various types of data you can access with your Google account.
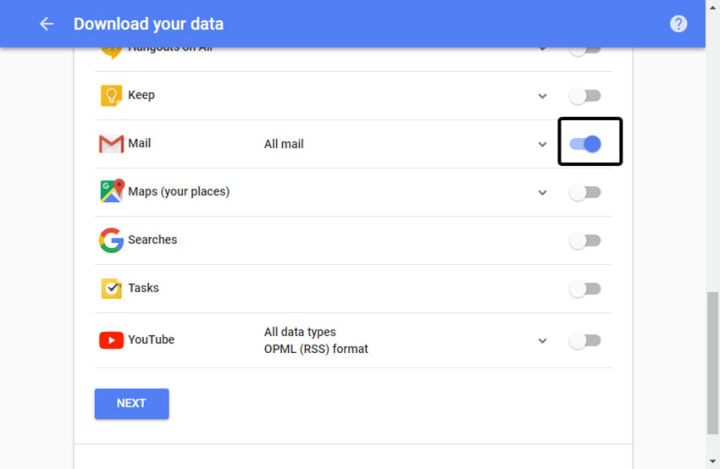
3. Slide the Gmail slider (on the right of the screen) to the right to back up your Gmail account. If you click the down arrow to the left of the slider, the screen expands and you can further refine which parts of your Gmail you want to back up:
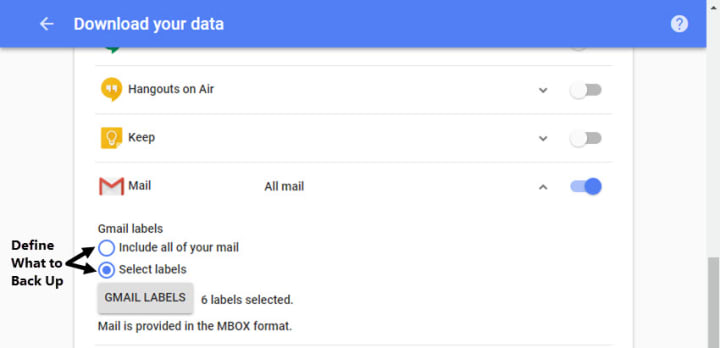
Choose one of the following options:
Click the toggle next to Include all your mail to back up all your Gmail.
Click the toggle button next to Select labels to bring up a screen that lets you choose which labels (folders) you want to back up.
4. When you've finished selecting data types to back up, click the Next button on the lower left of the screen. The Customize archive format screen displays:
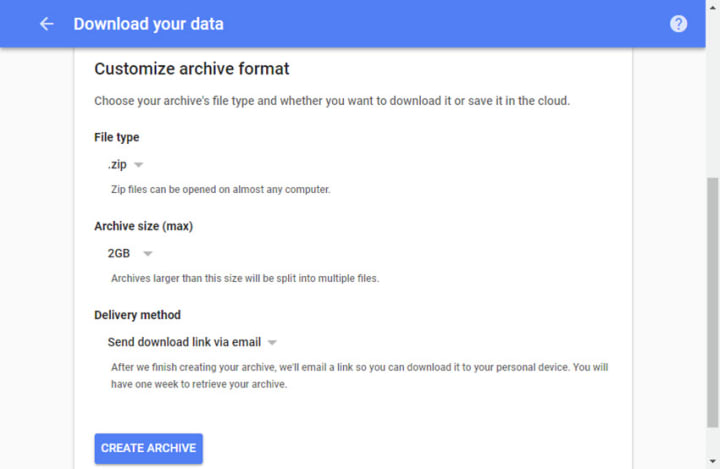
Use this screen to define the following characteristics of your archive:
File type. The default file type for your archive file is .zip. Click the down arrow to choose the .tgz file type. (This file type may be hard for most users to open.)
Archive size. The maximum file archive size is 50GB. Click the down arrow to choose one of the following file sizes: 1GB, 2GB, 4GB, 10GB, 50GB.
Delivery method. This is how you'll get your archived data. Click the down arrow to choose between receiving an email download link, a file on Google Drive, a file on Dropbox, or a file on OneDrive.
Caution: Archives stored on Google Drive count against the Google storage quota. If your archive is particularly large, you may want to choose another means of receiving it.
5. When you're finished selecting your archive format options, click the Create Archive button in the lower left corner.
You'll see a notice on the next screen that your archive is being prepared. (The archive process isn't instantaneous.) When your archive is ready, you'll be notified of the archive's location through email. Here's what the email might look like:
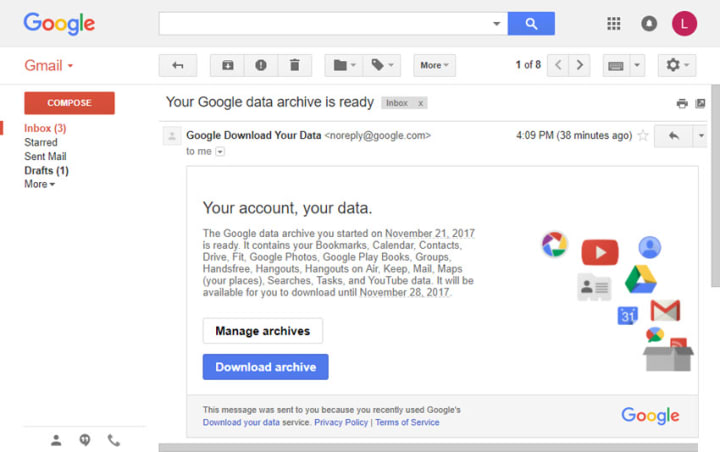
6. Follow the instructions in the email to access your Gmail archive. (In the example above, I would click the Download archive button.)
3. Other Methods to Create a Gmail Backup
While the Google Backup Utility is pretty straight-forward, you do have to remember to create the Gmail archive. A more automated way to back up your Gmail email is to use a desktop client such as Microsoft Outlook, Thunderbird (iOS), or Apple Mail.
Note: For this example, I'll use Outlook. If your desktop client is different, the steps you follow might be slightly different.
Set your desktop client up so that it retrieves messages from Gmail onto your computer through IMAP protocol. Here's what to do:
Step 1. Turn Your IMAP Access On
1. Go to Settings > Settings > Forwarding and POP/IMAP in Gmail to make sure that IMAP is turned on. Your screen should look like this:
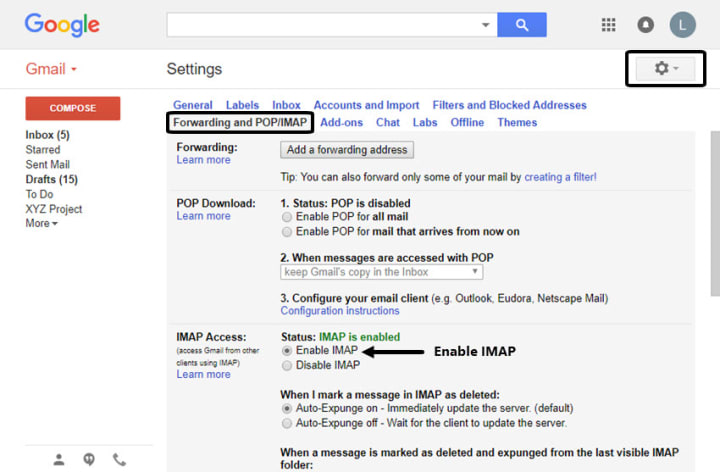
If IMAP isn't enabled, click the Enable IMAP toggle.
2. Google considers most desktop email apps to be less secure. So, you'll have to change the security settings in your Google account so that it'll give you your desktop email client access to your Gmail account. To start, go to https://myaccount.google.com/. You'll see the My Account screen:
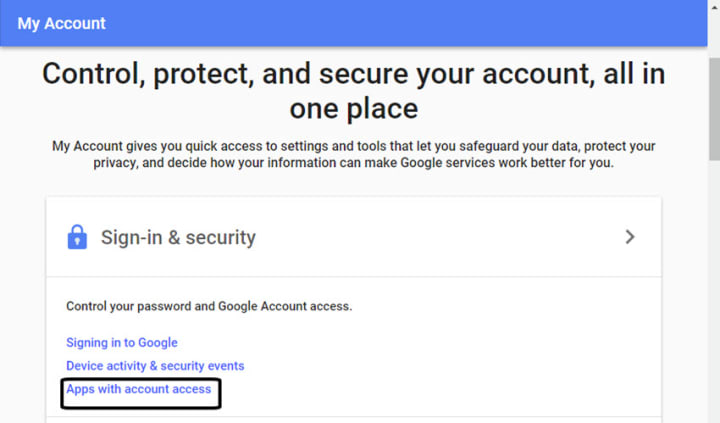
3. Select Apps with account access. The Sign-in & security screen appears. Scroll down on the Sign-in & security screen to the Allow less secure apps: option:
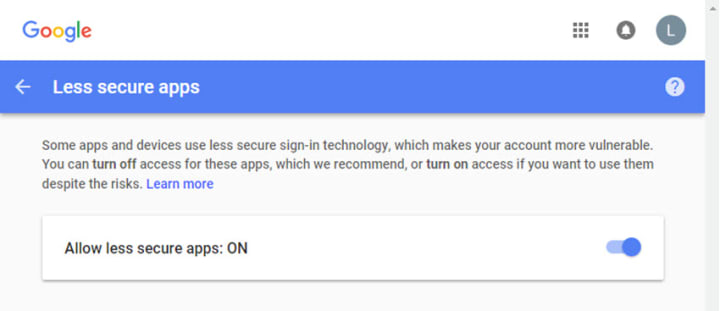
Slide the toggle to the right so that your desktop email client can access your Gmail account.
Step 2. Add Your Gmail Account to Your Desktop Email Client
Your next step is to add your Gmail account to your desktop email client. The exact process you'll use to do this varies depending on your desktop email client.
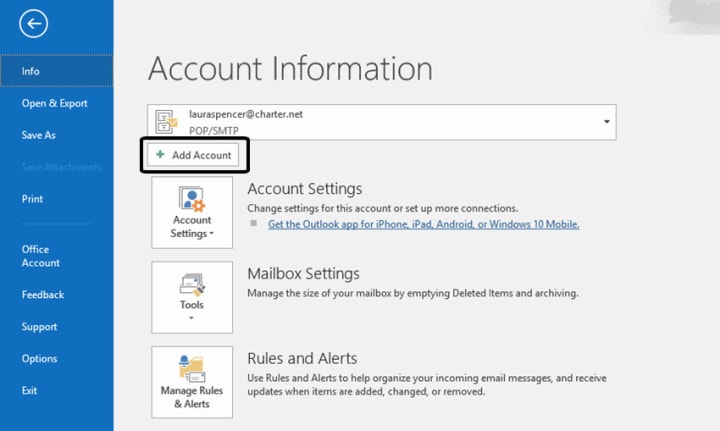
1. For MS-Outlook, click File. When the Account Information screen appears, click the Add Account button:
2. You'll be prompted to enter the Gmail account and password you want to add to Outlook. Type the information and click the Connect button. The following prompt displays:

3. Click OK to finish connecting your Gmail account to your desktop account. Your accounts are connected.
You'll receive an email message with the subject line: Microsoft Outlook Test Message in your Outlook inbox. In your Gmail inbox, you'll get the same message.
From this point forward, messages sent to your Gmail address will also be sent to MS Outlook. Even if you were to lose access to your Gmail account, you can still access your Gmail messages through Outlook. Remember though, if you delete a message from your Gmail account, it will be removed from your Outlook inbox as well.
Caution: Filters and other organizational tools you've applied in your Gmail inbox may not carry forward to your desktop email system.
Source: Tutsplus.com
About the Creator
Keep reading
More stories from Student Matters and writers in 01 and other communities.
11 quick ways to clear hidden Space on your Android
Updated June 29, 2020 to reflect the latest Android tools. Few things in life are as annoying as finding that your Android handset refuses to install any more app updates because it’s run out of storage. Unlike many of life’s little annoyances, though, this one’s easy to fix. You can't do anything about your system files, but you can quickly clear out precious gigs by sweeping up stale downloads, rooting out offline maps and documents, clearing caches, and wiping unneeded music and video files. And if these tips don’t do the trick, check out our picks for the best Android phones for every need and budget.
By Student Matters5 years ago in 01
The Evolution of Utility Tokens in a Data-Driven Digital Economy
The cryptocurrency market has grown far beyond simple peer-to-peer payments. These days, blockchain projects are all about fixing problems in the real world, like supply chain verification and data validation, as well as decentralized finance and digital identity.
By Muhammad Irfan Afzal7 days ago in 01
Top 10 Medication Management App Development Companies in 2026
In recent years, mobile health technology has fundamentally reshaped how patients engage with their treatments. One of the most promising developments in this space has been medication management applications — digital tools that help individuals track prescriptions, set reminders, manage dosages, and reduce the risk of medication errors. What was once a simple alarm clock for pills has evolved into a suite of features that support people living with chronic conditions, caregivers juggling complex regimens, and healthcare professionals seeking adherence insights.
By Olivia Carterabout 7 hours ago in 01


Comments
There are no comments for this story
Be the first to respond and start the conversation.