
Getting Started with Spring Boot: A Beginner's Guide
Exploring the Basics of Building Stand-Alone, Production-Ready Spring Applications


Introduction
Welcome to this beginner's guide on Spring Boot, a powerful tool for building stand-alone, production-ready Spring applications. In this blog post, we'll explore the basics of Spring Boot, including its advantages and how to create a simple RESTful API using this platform. Let's dive in!
What is Spring Boot?
Spring Boot is an open-source Java-based framework used to create a microservice. It is developed by Pivotal Team and is used to build stand-alone and production-ready Spring applications. Spring Boot simplifies the bootstrap and development process through its auto-configuration and dependency management features.
Advantages of Spring Boot
- Auto-Configuration: Spring Boot offers out-of-the-box configurations, helping developers get started quickly without worrying about setting up the application from scratch.
- Stand-Alone: Spring Boot applications are stand-alone, meaning they can run independently and do not require deployment on external servers.
- Production-Ready: Spring Boot includes essential features for production-grade applications like metrics, health checks, and externalized configuration.
- Spring Ecosystem: Spring Boot integrates seamlessly with the broader Spring ecosystem, including Spring Data, Spring Security, and more.
Setting Up a Spring Boot Project
Before getting started, make sure you have the Java Development Kit (JDK) and Maven installed.
To create a new Spring Boot application, follow these steps:
- Go to the Spring Initializr website.
- Select your project options. For this guide, we'll choose Maven as the build tool, Java as the language, and the latest stable Spring Boot version.
- In the "Project Metadata" section, enter 'com.example' for Group and 'demo' for Artifact.
- Click the "Generate" button. This will download a zip file containing your project.
Unzip the downloaded file, and you'll find a Maven project that can be imported into your favorite IDE.
Creating a Simple RESTful API
Let's create a simple RESTful API with Spring Boot. We'll create a HelloController class with a single endpoint that returns a greeting.
package com.example.demo;
import org.springframework.web.bind.annotation.GetMapping;
import org.springframework.web.bind.annotation.RequestParam;
import org.springframework.web.bind.annotation.RestController;
@RestController
public class HelloController {
@GetMapping("/hello")
public String hello(@RequestParam(value = "name", defaultValue = "World") String name) {
return String.format("Hello %s!", name);
}
}
In this code, @RestController marks the class as a controller where every method returns a domain object instead of a view. @GetMapping is a composed annotation that acts as a shortcut for @RequestMapping(method = RequestMethod.GET). Here, we've mapped the hello() function to the '/hello' endpoint, which returns a greeting.
Running the Application
You can run the Spring Boot application by using the following command in the terminal from the root directory of the project:
mvn spring-boot:run
After running the command, open your web browser and go to http://localhost:8080/hello. You'll see the message "Hello World!". You can customize the message by using http://localhost:8080/hello?name=YourName, which will then display "Hello YourName!".
Understanding the Basic Structure of a Spring Boot Application
Once you have set up your Spring Boot project, it's essential to understand its basic structure. Spring Boot follows a conventional project structure, which helps developers quickly understand and navigate the application.
Here's a brief explanation of the key components:
- Maven Project Structure: Spring Boot applications typically use Maven or Gradle as a build tool. Your project is organized into a standard structure with src/main/java for your application code and src/main/resources for resources like application properties.
- Main Application Class: This is where your application starts. It includes a main method that uses Spring Boot’s SpringApplication.run() method to launch the application.
- Application.properties file: This file, located under src/main/resources, is used to configure application settings, like server port, database properties, and more.
- POM.xml: This is your Maven Project Object Model file. It includes the project dependencies, plugins, and other specifics like versioning.
- Controllers: These are typically java classes annotated with @RestController, where you define your request handling methods. They act as an entry point for RESTful requests.
- Service Layer: If your application has business logic, it's best to keep it separate from the controllers in service classes.
- Repository Layer: This layer communicates with your database. Spring Boot makes it easy to define these with the help of Spring Data JPA.
Understanding these components is the first step in mastering Spring Boot. It will make it easier for you to create complex applications as you continue to learn and explore more advanced features of Spring Boot.
Conclusion
Spring Boot is a powerful tool that simplifies the process of developing Spring applications, making it an excellent choice for beginners and experienced developers alike. This guide provides a basic introduction to Spring Boot. As you continue learning, you'll discover more advanced features and the full potential of this framework. Good luck!
About the Creator
Keep reading
More stories from Alexander Obregon and writers in 01 and other communities.
LeetCode vs HackerRank for Coding Interview Prep
Introduction In the evolving world of tech, companies are constantly on the lookout for software engineers who can solve complex problems. As a result, the ability to perform in coding interviews is a vital skill for anyone looking to land a job in this industry. Two of the most popular platforms that software engineers use to prepare for these interviews are LeetCode and HackerRank. But which is the best? Let's break down their features, strengths, and weaknesses to give you a clearer perspective.
By Alexander Obregon3 years ago in 01
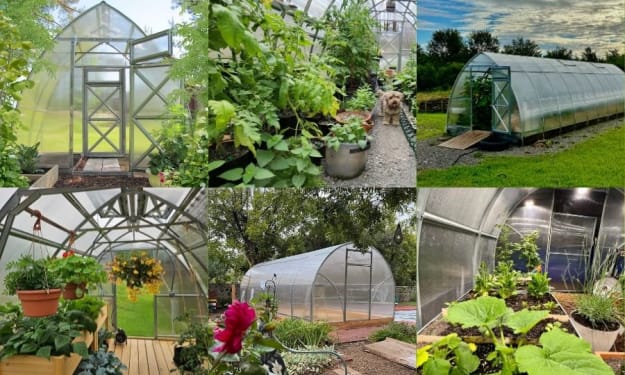
Choosing the Best Winter Proof Greenhouse in Canada: A Complete Guide
Gardening in Canada can be challenging due to the country’s long, cold winters and unpredictable weather. However, with the right greenhouse setup, growing plants throughout the year becomes possible. A winter proof greenhouse allows gardeners to extend their growing season, protect plants from harsh weather, and maintain ideal growing conditions even during freezing temperatures. Today, many people are investing in greenhouse kits and durable structures designed specifically for Canadian climates.
By charliesamuel4 days ago in 01
Pandora’s Burden
“My brother warned me to not accept gifts from the one who commissioned you,” said Epimetheus to the woman clad in silvery raiments standing at the entrance to the temple. Her silver tiara and the silver rings on her fingers and toes glinted in the firelight cast by torches set on either side of the doorway. Lingering in the shadows, beyond the reach of the flames as she was, he could not tell what she held in her hands. At first what appeared to be a box was perhaps a funerary urn, or maybe merely an apple.
By J. Otis Haasabout 6 hours ago in Fiction


Comments
There are no comments for this story
Be the first to respond and start the conversation.