
Affordable VPS Hosting in Canada: The Ultimate Guide for Startups & Developers
Upgrading to a Virtual Private Server (VPS) is often the right move once a site outgrows basic shared hosting. Shared hosting “splits” server resources among many customers, so performance can suffer as one site’s traffic climbs. By contrast, a VPS gives you dedicated CPU, RAM and bandwidth within a shared machine – the best of both worlds. A recent guide notes that a low-cost VPS “provides dedicated resources like CPU, RAM, and bandwidth, ensuring faster speeds and reliability” and calls it the “perfect middle ground between shared and dedicated hosting”. In practical terms, VPS is faster and more stable than shared hosting, without the high cost of a full dedicated server. If you’re hitting traffic or resource limits, need custom software or stronger security, or plan to run an online store, moving to VPS is a smart next step. In fact, roughly 30–40% of users choose a low-cost VPS as their first upgrade from shared hosting to get better performance and control.
Understanding VPS vs Shared and Dedicated Hosting
In practical terms, shared hosting means your website shares memory, CPU and I/O with others. It’s very budget-friendly, but if a neighbor hogs resources, your site slows down. Dedicated hosting gives you a whole server – maximum performance and customization – but it’s often overkill (and overpriced) for small sites or startups. A VPS strikes the balance: you still share the physical machine, but you have guaranteed slices of CPU and RAM just for you. That isolation means one user’s traffic spike won’t drag down another’s site. You also get root/administrative access, so you can install any software or security tools you need. In short, moving to a VPS means faster, more consistent speeds and far greater control (for example, installing custom firewalls or service configurations). As one guide notes, by spending a bit more to switch from shared to VPS “you can enjoy better performance with dedicated resources”.
Key benefits of VPS hosting include:
- Dedicated resources: Your CPU, RAM and disk space are reserved for you. This yields consistent page loads even under heavy traffic.
- Root access: You get full server control. You can customize settings and install optimizations (for example, choosing a fast web server or setting up caching) to maximize performance.
- Scalability: You can usually upgrade your plan (more CPU cores, RAM or storage) without downtime, so the VPS grows as you grow.
- Improved security: VPS environments isolate accounts more than shared hosting. While you still must apply updates and strong passwords, attackers on another account cannot easily breach your server. (We’ll cover security again below.)
Overall, a VPS offers a dramatic upgrade in performance and flexibility compared to shared hosting, and it costs much less than a dedicated box. For a small business or startup on a budget, VPS hosting gives professional-grade resources at an affordable price.
Benefits of Choosing a Canadian VPS Provider
Choosing a host with Canadian data centers delivers tangible benefits if your audience is local. For example, Canadian servers greatly reduce network latency for Canadian visitors. In practical terms, data from a Toronto or Vancouver server reaches Canadian users much faster than if it has to travel from the U.S. or overseas. This cut in lag time means faster page loads, lower bounce rates, and even better SEO for your site. (Studies show that even a 1-second delay can hurt conversions, so every millisecond counts.)
Another important advantage is data sovereignty and privacy. Hosting in Canada means your data falls under Canadian laws (like PIPEDA) rather than U.S. or other jurisdictions. Businesses that deal with customer information often prefer this, since their data stays on Canadian soil and enjoys Canadian privacy protections. This can be a selling point to local customers.
Finally, Canadian hosting offers local support and service. If your host’s support team is based in Canada, they understand local needs and time zones. You’re less likely to hit language barriers or after-hours delays. As one Canadian host notes, local customers get “direct support from experts” with “faster response times” and personalized solutions. In short, choosing a Canadian VPS host can mean quicker, more familiar service when you need help. For small businesses and startups, these factors (faster speeds, clearer regulations, and local tech support) make a Canadian VPS provider especially attractive.
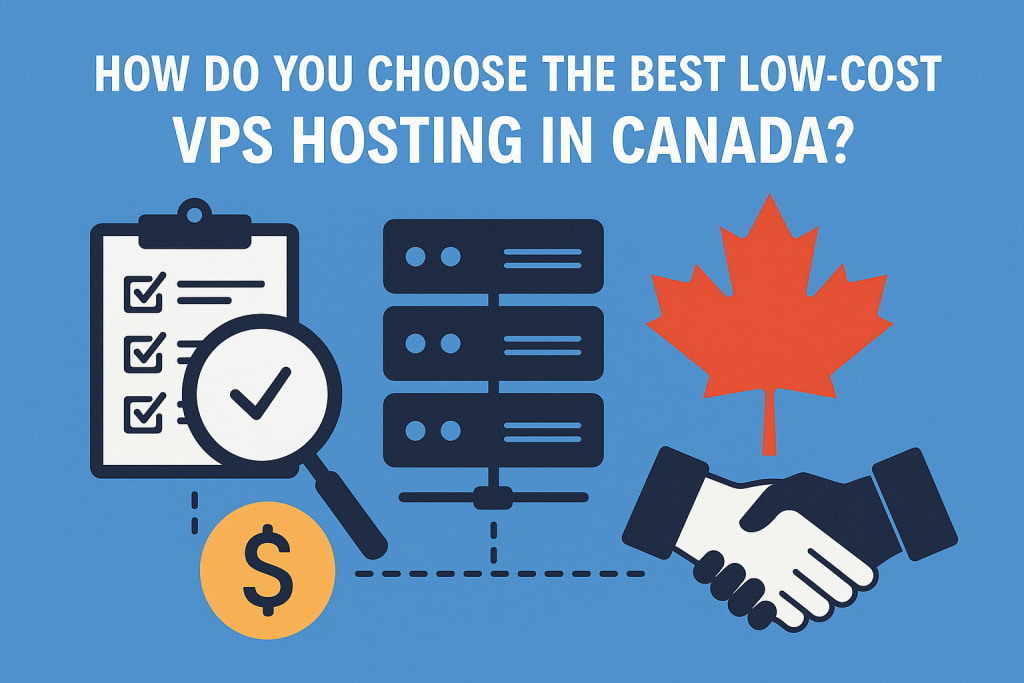
Key Decision Factors for a Budget VPS
When comparing low-cost VPS plans, focus on these essential factors:
- Performance (Resources): Check the CPU, RAM and storage. More CPU cores allow better multitasking (at least 1–2 cores for most small sites), and RAM should match your needs (1–4 GB is typical for a modest site or dev project). Always prefer SSD/NVMe storage over older HDD drives. Solid-state disks offer dramatically faster access times – often 50–100× faster than HDDs – which means quicker page loads. Also look at bandwidth or traffic limits; avoid vague “unlimited” claims that may throttle or oversell resources. In fact, reviewers warn that “unlimited storage” often hides hard caps.
- Pricing and Plans: Compare the price per period, not just the first invoice. Many hosts advertise a rock-bottom entry price that jumps on renewal. Check renewal rates, setup fees, and whether you must pre-pay for a year to get the low rate. Beware of hidden costs (control panels, backups, SSL certificates can be extra on some hosts). Look for transparency: as one Canadian host advises, truly low-cost plans should have no hidden fees and clear pricing. (Longer contracts often yield lower monthly costs, but only pay up front if you’re sure of the host.)
- Managed vs. Unmanaged: Decide how much server management you want. Managed VPS plans include system administration – the host handles OS updates, patches, and sometimes backups. This is ideal if you lack sysadmin skills. Unmanaged plans are cheaper (in fact, around 60% of low-cost VPS users choose unmanaged for the savings) but you’re on your own for security and updates. Semi-managed options (e.g. managed control panel only) also exist. If you’re comfortable with Linux commands or have IT support, an unmanaged plan can save money. Otherwise, a low-cost managed VPS can prevent a lot of headaches.
- Security Features: Even on a budget plan, check what security is included. At minimum, ensure you can install a firewall (many Linux distros include one). Bonus features to look for: DDoS protection, automated malware scans, and (critically) backups. Choose a host that does daily backups or snapshots – losing data to server failure can be very costly. (For example, 4GoodHosting’s plans come with automatic daily backups as a standard feature.) Make sure you can also set up your own backups and apply updates to keep the server secure.
- Customer Support: Even the best VPS can have issues. Check that the provider offers 24/7 technical support (phone, chat or ticket) in Canada. Read reviews or test their response by asking pre-sales questions. Fast, knowledgeable support can save you hours if something goes wrong. For example, independent reviewers note that 4GoodHosting’s support is “top-notch,” with representatives responding in under 30 seconds during a chat test. In general, prioritize hosts with good reputations for help, knowledgebase resources, and quick problem resolution.
In summary, weigh performance and storage specs heavily, then consider total cost (including future renewal). Also factor in whether you want the host to manage the server and what security features and support they provide. The right balance depends on your team’s skills and your site’s needs.
Evaluating Canadian VPS Hosting Providers
To find the best Canadian VPS host on a budget, take a systematic approach:
- Search and Shortlist: Use specific search terms like “low-cost Canadian VPS hosting” or “cheap Canada VPS server”. Compile a list of candidates – include well-known Canadian hosts as well as smaller specialized firms. Don’t limit yourself to the first result page.
- Compare Offerings: Visit each provider’s website. Look for clear plan details: CPU cores, RAM, SSD space, bandwidth, and price. Ensure they advertise Canadian data centers (e.g. Toronto or Vancouver). Check contract terms (minimum period, money-back guarantees, and renewal pricing). Note any extra services like included domain names, backup solutions, or control panels. A reliable Canadian host will clearly list these features.
- Assess Reliability and Reviews: Research each host’s track record. Look for uptime claims or real tests (some review sites publish performance data). Read customer reviews on third-party sites (Trustpilot, HostAdvice, G2, etc.). Independent guides recommend weighing “reliability, reputation, customer reviews, and pricing” when choosing a provider. Pay attention to any red flags – frequent outage reports or unresolved complaints. Conversely, positive mentions of responsive support or stable servers are good signs.
- Test Support and Features: Don’t be shy to ask questions. Submit a support ticket or use live chat with some technical questions (e.g. “How are backups handled?” or “Can I install Docker?”). This tests their responsiveness and expertise. Also confirm what operating systems and control panels they offer. For example, 4GoodHosting offers both Linux and Windows VPS plans, plus cPanel for easy management. Make sure the host supports the OS and software stack you need.
- Check Additional Benefits: Some hosts bundle extras. For instance, 4GoodHosting provides free domains on certain plans and has an A+ BBB accreditation (indicating trust). Others may include free SSL certificates or site migration assistance. These extras can add value to your purchase.
- By following these steps, you can narrow the field to a few solid Canadian VPS providers. When possible, include 4GoodHosting on your shortlist – they have competitive low-cost VPS plans (with SSD storage and Canadian servers) and are often highlighted for customer service.
Checklist for Setting Up Your VPS in Canada
Once you’ve selected a VPS plan and provider, follow this checklist to ensure a smooth setup:
- Plan Your Migration: If you’re moving an existing site, start by backing up all your files and databases. For example, you might use cPanel’s backup tool to create a zip of your website files. Download and securely store these backups. Decide on your migration method: manually transfer files via SSH/FTP, use a migration plugin, or see if the host offers assisted migration.
- Choose and Prepare the OS: Select the operating system that fits your site (common choices are Ubuntu/CentOS for Linux, or Windows if you need .NET support). Boot up your new VPS and make sure it is updated (sudo apt update && sudo apt upgrade on Linux). Install any control panel if needed (4GoodHosting supports cPanel, which simplifies management).
- Install Essential Software: Set up your web server (Apache, Nginx, etc.), database server, and any language runtimes (PHP, Python, etc.) that your site requires. If the host provides one-click installers or package managers, use them to configure your environment. Enable necessary services (SSH for access, FTP if needed, mail server if you host email, etc.).
- Harden Security: Immediately change default credentials. Install a firewall (e.g. UFW or iptables on Linux) and allow only needed ports. Disable root SSH login and consider using SSH keys. Set up any security modules (fail2ban, SELinux, or vendor-specific tools). Verify that automatic security updates or control panel patching is enabled if offered. Backup strategy: Ensure automatic backups are scheduled – either through the host’s backup system or via your own scripts. (Reliable hosts include daily backups; e.g., 4GoodHosting advertises “Automatic daily backups and disaster-proof coverage”.) Also store a copy of your backup off-server (cloud storage or local drive) for extra safety.
- Transfer Site Data: Upload your website files and database to the VPS. For example, one method is using wget on the server to pull a zipped backup from the old host, then unzipping it. Create new databases/users and import your SQL data. Update any configuration files (e.g. database names or paths) to the new settings. Thoroughly test the site via a temporary URL or by editing your local hosts file to point the domain to the new server’s IP.
- Update DNS and Launch: When everything is confirmed working, update your domain’s DNS records. Change the nameserver entries or A records to point to your new VPS’s IP address. Remember DNS changes can take a few hours to propagate. Once live, monitor the site to ensure stability.
- Final Checks: After the switch, test email (if hosted), SSL certificates (install Let’s Encrypt or upload your certificates), and any other services. Confirm your backup routines are running and that you can restore from them. Congratulations – your Canadian VPS is now up and running!
Common Pitfalls to Avoid
Even on a budget, make sure you steer clear of these mistakes:
- Chasing Price Only: The cheapest plan isn’t always the best deal. Very low-cost hosts may oversubscribe resources (resulting in slow or unstable performance) or use outdated hardware. Reviews caution against blindly picking the lowest price, noting that “’cheap’ does not mean ‘the lowest price’” if it sacrifices quality. Often you’ll end up with slow service or frequent downtime.
- Unlimited Claims and Upsells: Watch out for vague terms like “unlimited storage” or “unlimited bandwidth”. These often have hidden restrictions or throttling. Also beware of hosts that heavily upsell essential features (backups, SSL, malware scanning) as expensive add-ons. A truly low-cost VPS should include basics like security and backups, not make you pay extra for them.
- Introductory vs Renewal Rates: Many hosts lure you in with a deep discount for the first term, then sharply raise the price on renewal. We’ve seen cases where the renewal price is more than double the introductory rate. Always read the fine print on contract lengths and renewal pricing. It can be better to pay slightly more initially if the renewal rate is stable.
- Not Planning for Growth: Don’t assume your current plan will suffice forever. Look ahead: can you easily upgrade CPU, RAM or storage later if needed? The host should make scaling painless. Investing a bit extra now in a host that makes upgrades simple can save you headaches (and downtime) when your site traffic spikes.
- Poor Support: If support is limited or slow, small issues can turn into big problems. Ensure the host offers responsive assistance. As noted, 4GoodHosting’s support has been praised as “top-notch”. Check reviews specifically for support experiences. Remember – minutes saved by fast support are often worth more than the money saved on a cheap host.
- Overlooking Security: Don’t assume a low-cost plan is secure by default. Verify that the provider offers a secure architecture (account isolation, firewalls, DDoS protection, etc.). Make sure you follow security best practices (strong passwords, updates, backups). Neglecting backups or updates is a common oversight that can leave a site vulnerable. Always double-check what security layers (like spam filtering or malware scans) are included.
By avoiding these pitfalls, you’ll ensure your affordable VPS remains reliable and scalable. The goal is to spend wisely – not just pick the cheapest host, but to get the best value for your budget.
Conclusion: Why 4GoodHosting is the Smart Choice
For Canadian small businesses and startups seeking budget-friendly VPS hosting, 4GoodHosting stands out as a strong candidate. They are a Canadian-based provider (in business since 2002) that specializes in affordable, reliable hosting. Notably, 4GoodHosting maintains data centers in both Vancouver and Toronto, giving Canadian users the low-latency benefit discussed above.
Industry reviews highlight 4GoodHosting’s strengths: one review calls them “a safe bet” for Canadian customers, citing their “top-notch customer support” and “competitively priced, scalable” plans. The same review notes that 4GoodHosting offers automatic daily backups and even free domain names on certain plans. The company also holds an A+ BBB rating in Canada, reflecting its commitment to customer satisfaction and trust.
In practical terms, 4GoodHosting’s VPS plans include modern features (SSD storage, cPanel, multiple Linux/Windows OS choices) at very competitive rates. Their support team is available 24/7 by phone, chat or ticket, as independent testers verified (a rep answered live chat questions in under 30 seconds). For startups and small sites on a tight budget, having that kind of responsive help can be invaluable.
Overall, 4GoodHosting delivers the key qualities you’re looking for: Canadian servers (for speed and compliance), affordable pricing, reliable infrastructure, and friendly customer support. These attributes make 4GoodHosting a smart choice for any Canadian business or developer seeking low-cost VPS hosting without compromising on quality.
About the Creator
Keep reading
More stories from Steve Oscar and writers in 01 and other communities.
Why Toronto Medical Practices Need Local Hosting for Secure & Reliable Websites
For healthcare providers handling sensitive personal health information (PHI), reliable and secure web hosting solutions are essential to ensuring compliance with privacy laws, protecting patient data, and enhancing the overall user experience. Choosing local hosting, especially with a provider like 4GoodHosting, provides several strategic advantages.
By Steve Oscar7 months ago in 01
Amazon warehouse employee left stunned at Jeff Bezos’ response after she emailed him about pay
Tara Jones took her complaint straight to the top and sparked a major review of pay errors A woman who was employed by Amazon went straight to the organ grinder, not the monkey, when she had a pay dispute.
By Dena Falken Esq4 days ago in 01
Top 10 Ecommerce App Development Companies to Watch in 2026
In an increasingly mobile-first world, ecommerce app development has become central to how businesses reach, engage, and convert customers. From personalized shopping experiences to seamless checkout and omnichannel integration, ecommerce apps are now essential for brands of all sizes. As we move deeper into 2026, selecting the right partner to build your digital commerce platform can make the difference between a thriving marketplace and a missed opportunity.
By Aarti Jangid3 days ago in 01


Comments
There are no comments for this story
Be the first to respond and start the conversation.